Easy 7 Layer Punch Bowl Dessert Recipe Fun
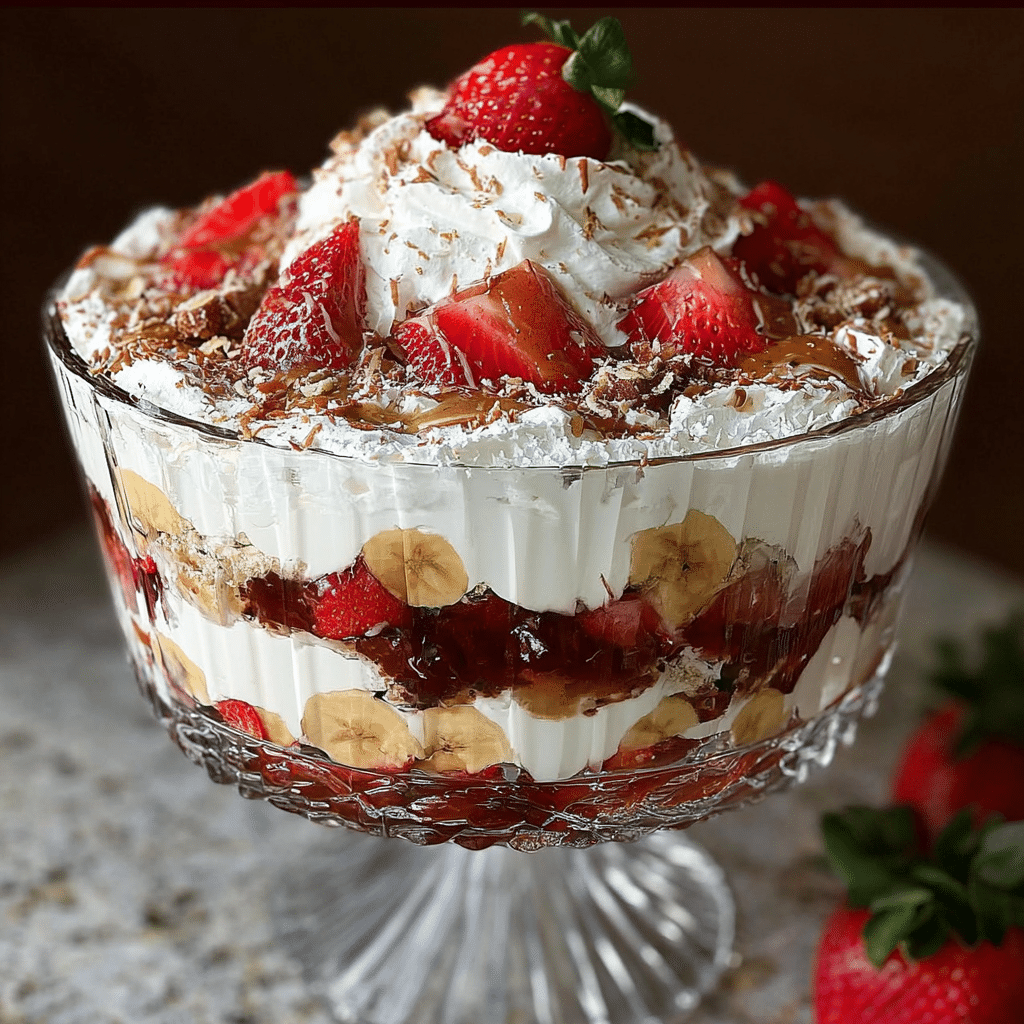
If you’re searching for a dessert that combines a fun presentation with layers of delightful flavors, the 7 Layer Punch Bowl Dessert is exactly what you need. This recipe is quick to put together, visually stunning, and packed with creamy, fruity, and sweet surprises that will wow your guests. Whether you’re hosting a summer gathering or simply craving a nostalgic treat, this easy 7 Layer Punch Bowl Dessert is a guaranteed crowd-pleaser that brings every bite to life.
Why You’ll Love This Recipe
- Effortless preparation: You can whip up the entire dessert in under 20 minutes with minimal ingredients, making it perfect for last-minute plans.
- Visual appeal: The colorful, layered look in a punch bowl makes this dessert festive and enticing for any occasion.
- Perfect for sharing: Served in a punch bowl, it invites everyone to grab a spoon and savor each delicious layer together.
- Customizable: The base recipe is adaptable, letting you tweak flavors or add your favorite fruits with ease.
- Kid-friendly: Its sweet, creamy layers and fruity burst make it a hit with children and adults alike.
Ingredients You’ll Need
The beauty of this 7 Layer Punch Bowl Dessert lies in its simplicity. Each ingredient plays a crucial role in creating a harmonious blend of flavors, textures, and colors, from creamy puddings to juicy fruits and crunchy bits.
- Creamy pudding mix: Adds silky texture and rich flavor that ties the layers together.
- Whipped topping: Provides fluffiness and lightness to balance the dense layers.
- Crushed pineapple: Brings juicy sweetness and a tropical note to the dessert.
- Mandarin oranges: Add vibrant color and a refreshing citrus burst.
- Shredded coconut: Introduces a chewy texture and subtle nutty taste.
- Chopped nuts: Contribute a necessary crunch that contrasts beautifully with creamy and juicy layers.
- Mini marshmallows: Give a soft, chewy contrast and a touch of whimsy to the dessert’s texture profile.
Variations for 7 Layer Punch Bowl Dessert
This recipe is a great starting point to make the 7 Layer Punch Bowl Dessert your own. Feel free to adjust layers, swap ingredients, or tailor it for dietary preferences; it’s versatile and forgiving!
- Fruit swap: Try fresh strawberries or blueberries instead of canned fruits for a fresher taste.
- Nut-free variation: Omit nuts and add sunflower seeds or additional shredded coconut for crunch without allergens.
- Dairy-free option: Use coconut-based pudding and whipped topping alternatives to keep it creamy and friendly for lactose intolerance.
- Chocolate twist: Incorporate mini chocolate chips or a drizzle of chocolate syrup between layers for a richer dessert.
- Seasonal flair: Add pumpkin puree and cinnamon in the fall for a cozy seasonal version of this punch bowl treat.

How to Make 7 Layer Punch Bowl Dessert
Step 1: Prepare the Pudding Mix
Begin by dissolving the pudding mix in cold milk according to the package instructions. Whisk until the mixture thickens to a smooth, creamy consistency. This layer sets the foundation for the dessert’s luscious texture.
Step 2: Layer the Crushed Pineapple
Drain the crushed pineapple to avoid excess liquid and spread it evenly over the bottom of your punch bowl. Its bright, sweet juice adds a refreshing layer that pairs perfectly with the creamy pudding.
Step 3: Add a Layer of Mandarin Oranges
Drain the mandarin oranges to keep the dessert from becoming watery. Carefully layer them over the pineapple, bringing vibrant color and zesty citrus notes to the dessert.
Step 4: Sprinkle Shredded Coconut and Mini Marshmallows
Evenly layer shredded coconut and mini marshmallows on top of the fruit for texture variety and a little sweetness that keeps each bite exciting.
Step 5: Pour the Pudding Layer
Gently pour half the prepared pudding over the layered fruits and toppings, making sure to cover everything evenly. This helps bind the ingredients together for a perfect spoonsful.
Step 6: Add Nuts and Remaining Whipped Topping
Sprinkle chopped nuts like walnuts or pecans over the pudding layer, then cover with the remaining whipped topping. The nuts add crunch, and the whipped topping ensures creaminess throughout.
Step 7: Chill and Serve
Refrigerate the punch bowl for at least two hours to allow all layers to meld beautifully. Serve chilled for the best flavor and texture experience.
Pro Tips for Making 7 Layer Punch Bowl Dessert
- Use well-drained fruit: Removing excess juice prevents the dessert from becoming soggy or watery.
- Chill ingredients beforehand: Cold pudding and whipped topping help maintain distinct layers and fresh taste.
- Layer gently: Use a spoon to carefully add each layer to keep the layers looking neat and vibrant.
- Customize nuts with care: Toast nuts lightly for extra flavor without overpowering the dessert’s sweetness.
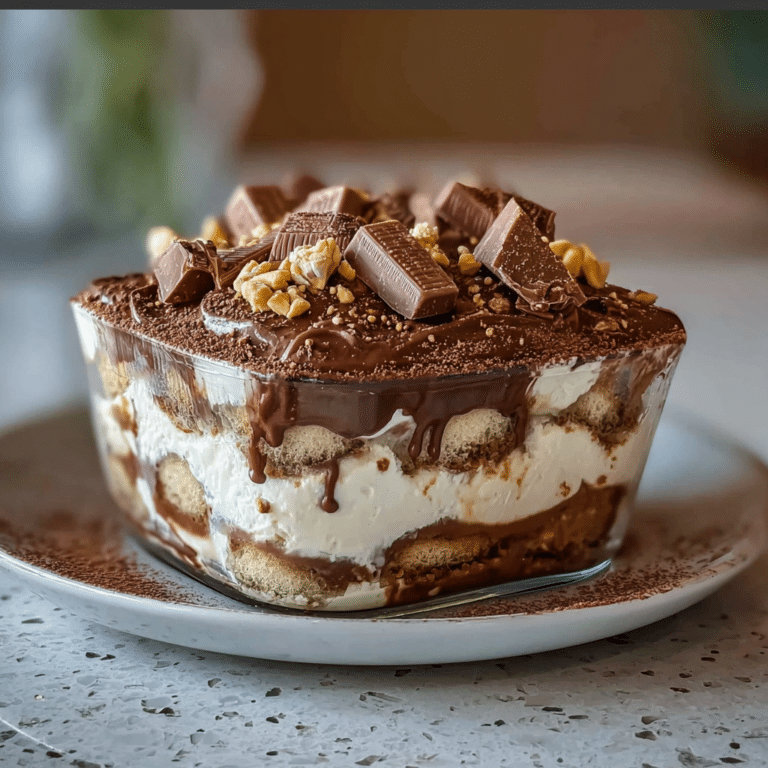
- Serve with a clear bowl: This showcases the beautiful layers and makes for a stunning presentation.
How to Serve 7 Layer Punch Bowl Dessert
Garnishes
Top with a sprinkle of shredded coconut or add fresh mint leaves for a pop of green that complements the dessert’s colors. You can also add a few whole mandarin slices on top for an elegant finish.
Side Dishes
Pair with light, crisp cookies or graham crackers that guests can scoop up alongside. Fresh fruit salads or a simple scoop of vanilla ice cream also make perfect companions.
Creative Ways to Present
Use individual clear cups or mason jars for a fun grab-and-go style. Alternately, layer your dessert in a trifle bowl or clear parfait glasses if you want single servings with the same impressive look.
Make Ahead and Storage
Storing Leftovers
Cover the punch bowl tightly with plastic wrap and refrigerate leftover dessert up to 3 days. Keep in mind the layers may soften slightly but will remain delicious.
Freezing
Freezing is not recommended because whipped topping and fresh fruit usually lose their texture when frozen and thawed.
Reheating
This dessert is best enjoyed cold, so reheating is not applicable. Simply allow it to sit at room temperature for 10 minutes if too chilled before serving.
FAQs
Can I use fresh fruit instead of canned?
Absolutely! Fresh pineapple chunks and fresh mandarin segments can be used; just be sure to drain any excess juice to maintain the dessert’s texture.
Is this dessert gluten-free?
Yes, the 7 Layer Punch Bowl Dessert is naturally gluten-free as long as you avoid any added ingredients that contain gluten, like certain nuts or marshmallows with wheat additives.
How long does this dessert last in the refrigerator?
It stays fresh and tasty for up to 3 days when properly covered. After that, the fruit and whipped topping textures might start to degrade.
Can I make it vegan?
Yes! Substitute dairy pudding with coconut or almond milk-based pudding, and use vegan whipped topping and marshmallows to keep it cruelty-free.
What’s the best way to serve this at a party?
Serve it in a large clear punch bowl with plenty of spoons, so guests can enjoy a little bit of every layer with each serving for a delicious variety.
Final Thoughts
The 7 Layer Punch Bowl Dessert is one of those timeless recipes that brings a sense of joy and nostalgia, wrapped in layers of creamy, fruity goodness. It’s easy enough for even the busiest host to prepare but special enough to impress everyone at your table. Don’t wait for a special occasion—try making this dessert today and watch how quickly it becomes a favorite in your recipe collection!
Related Posts
- How to Make No-Churn Strawberry Ice Cream Fast
- Why Sheet Pan Strawberry Shortcake Delights
- Irresistible Oreo Cheesecake Recipes to Try
7 Layer Punch Bowl Dessert
- Total Time: 2 hours 15 minutes (including chilling time)
- Yield: 8-10 servings
- Diet: Gluten Free
Description
The 7 Layer Punch Bowl Dessert is a visually stunning, easy-to-make layered dessert combining creamy pudding, juicy fruits, fluffy whipped topping, crunchy nuts, and chewy marshmallows. Perfect for summer gatherings or nostalgic treats, it’s quick to prepare, customizable, kid-friendly, and a guaranteed crowd-pleaser.
Ingredients
Base Ingredients
- Creamy pudding mix (1 package, any flavor you prefer)
- Cold milk (amount as per pudding package instructions)
- Whipped topping (1 container, about 8 oz)
- Crushed pineapple (1 can, drained)
- Mandarin oranges (1 can, drained)
- Shredded coconut (1/2 cup)
- Chopped nuts (1/2 cup, walnuts or pecans)
- Mini marshmallows (1/2 cup)
Instructions
- Prepare the Pudding Mix: Dissolve the pudding mix in cold milk according to the package instructions. Whisk until the mixture thickens to a smooth, creamy consistency. This forms the foundation of the dessert’s rich texture.
- Layer the Crushed Pineapple: Drain the crushed pineapple well to avoid excess liquid. Spread it evenly on the bottom of a large punch bowl to add a bright, sweet tropical layer.
- Add a Layer of Mandarin Oranges: Drain the mandarin oranges thoroughly. Layer them carefully over the pineapple, contributing vibrant color and zesty citrus flavors.
- Sprinkle Shredded Coconut and Mini Marshmallows: Evenly sprinkle the shredded coconut and mini marshmallows atop the fruit layers to add chewy texture and a hint of sweetness.
- Pour the Pudding Layer: Gently pour half of the prepared pudding over the fruit and toppings, covering everything evenly to bind the layers together.
- Add Nuts and Remaining Whipped Topping: Sprinkle chopped nuts, such as walnuts or pecans, over the pudding layer. Then spread the remaining whipped topping over the nuts to ensure creaminess throughout.
- Chill and Serve: Refrigerate the assembled dessert for at least two hours to allow the layers to meld. Serve chilled for the best flavor and texture experience.
Notes
- Use well-drained fruit to prevent sogginess.
- Chill pudding and whipped topping before assembling to maintain distinct layers.
- Layer gently with a spoon to keep layers neat and vibrant.
- Toast nuts lightly for enhanced flavor without overpowering sweetness.
- Serve in a clear bowl to showcase the beautiful layers.
- Substitute fresh fruit for canned for a fresher taste, ensuring excess juice is drained.
- For nut-free versions, omit nuts and add sunflower seeds or more shredded coconut.
- Dairy-free options are possible using coconut-based pudding and whipped topping alternatives.
- To make it vegan, use plant-based pudding, whipped topping, and marshmallows.
- Prep Time: 15 minutes
- Cook Time: 0 minutes
- Category: Dessert
- Method: No-bake
- Cuisine: American
Nutrition
- Serving Size: 1 cup
- Calories: 250
- Sugar: 20g
- Sodium: 120mg
- Fat: 12g
- Saturated Fat: 8g
- Unsaturated Fat: 3g
- Trans Fat: 0g
- Carbohydrates: 30g
- Fiber: 2g
- Protein: 3g
- Cholesterol: 15mg
Keywords: 7 Layer Dessert, Punch Bowl Dessert, Layered Fruit Dessert, No Bake Dessert, Summer Dessert, Crowd Pleaser, Creamy Dessert, Fruity Dessert

