Irresistible Butterfinger Candy Bar Poke Cake Recipe
Indulge your sweet tooth with the incredible Butterfinger Candy Bar Poke Cake, a dessert that perfectly blends rich, creamy textures with the irresistible crunch of Butterfinger candy bars. This luscious treat is easy to make, combining moist cake, gooey fillings, and crunchy candy in every bite. Whether you’re serving it for a special occasion or just because, this Butterfinger Candy Bar Poke Cake is sure to become a fast favorite in your dessert lineup.
Why You’ll Love This Recipe
- Effortless preparation: This cake recipe comes together quickly using simple steps that anyone can follow.
- Perfectly balanced flavors: The sweetness of the cake pairs beautifully with the buttery, crunchy Butterfinger candy pieces.
- Versatile dessert: Great for birthdays, potlucks, or as a comforting treat after dinner.
- Textural delight: The poke technique creates pockets of creamy filling that soak into the cake wonderfully.
- Impressive presentation: Its layered look with candy topping always grabs attention and compliments.
Ingredients You’ll Need
Each component in this Butterfinger Candy Bar Poke Cake contributes to its irresistible taste and texture, keeping the process simple but delivering exceptional results. From rich cake mix to crunchy candy bars, every ingredient plays a key role.
- Yellow cake mix: Offers a moist and fluffy base, perfect for absorbing the creamy filling.
- Butterfinger candy bars: Crushed to add a sweet, crunchy sensation throughout and on top.
- Sweetened condensed milk: Creates the luscious, gooey filling that soaks into the cake.
- Vanilla pudding mix: Provides creaminess and enhances the overall flavor profile.
- Whipped topping: Adds a light, fluffy texture to the pudding layer.
- Butter and eggs: Essential for cake richness and structure.
- Milk: Helps create the perfect pudding consistency.
Variations for Butterfinger Candy Bar Poke Cake
Feel free to personalize this Butterfinger Candy Bar Poke Cake to suit your tastes or dietary preferences. It’s simple to modify, so you can experiment with flavors and textures easily.
- Chocolate cake base: Swap yellow cake for chocolate cake to add a deeper cocoa richness.
- Peanut butter twist: Add peanut butter chips or a layer of peanut butter frosting for an extra nutty kick.
- Gluten-free option: Use a gluten-free cake mix to accommodate dietary restrictions.
- Dairy-free substitute: Replace condensed milk and pudding mix with coconut milk-based alternatives.
- Extra candy mix-ins: Fold in or top with chopped Snickers, Reese’s, or Heath bars for varied crunch.

How to Make Butterfinger Candy Bar Poke Cake
Step 1: Bake the cake
Preheat your oven and prepare the yellow cake mix according to the package instructions, combining eggs, milk, butter, and mix until smooth. Pour into a greased baking pan and bake until a toothpick inserted in the center comes out clean. Let it cool slightly.
Step 2: Poke the cake
Use the handle of a wooden spoon or a fork to poke holes all over the surface of the warm cake. These holes will allow the sweetened condensed milk mixture to seep in and create that signature moist and creamy texture.
Step 3: Pour the filling
Mix the sweetened condensed milk with crushed Butterfinger pieces, then gently pour it evenly over the cake, making sure the liquid sinks into each hole. Allow it to soak and cool completely.
Step 4: Prepare the pudding layer
Combine the vanilla pudding mix with cold milk and whisk until thickened. Fold in whipped topping gently to maintain fluffiness, then spread this creamy mixture over the soaked cake.
Step 5: Add the candy topping
Top the cake with more crushed Butterfinger candy bars for extra crunch and irresistible flavor. Chill the cake for at least a few hours before serving to allow all the layers to set beautifully.
Pro Tips for Making Butterfinger Candy Bar Poke Cake
- Use room temperature ingredients: This helps the cake batter mix evenly and results in a tender crumb.
- Don’t skip poking: The holes allow the filling to penetrate deeply, ensuring each bite is moist and flavorful.
- Crush candy bars gently: Avoid pulverizing completely to keep that desirable crunchy texture.
- Chill thoroughly: Refrigerate for at least 4 hours or overnight for the best texture and flavor combination.
- Make ahead friendly: This cake tastes even better after resting, so prepare it a day in advance if possible.
How to Serve Butterfinger Candy Bar Poke Cake
Garnishes
Enhance your Butterfinger Candy Bar Poke Cake with additional crushed candy bars, a light drizzle of caramel or chocolate sauce, or even a sprinkle of sea salt for a flavor contrast that excites the palate.
Side Dishes
Serve alongside a scoop of vanilla or chocolate ice cream, fresh berries for balance, or a simple cup of coffee to complement the cake’s rich sweetness.
Creative Ways to Present
For entertaining, serve individual portions in clear cups layered with extra whipped topping and candy bar bits on top, or create a dessert platter with assorted chocolates and nuts to accompany the cake slices.
Make Ahead and Storage
Storing Leftovers
Keep your Butterfinger Candy Bar Poke Cake covered tightly with plastic wrap or stored in an airtight container in the refrigerator. It remains fresh and delicious for up to 4 days.
Freezing
You can freeze the cake, ideally before adding the whipped topping layer. Wrap it securely and freeze for up to 2 months. Thaw overnight in the fridge before serving.
Reheating
This cake is best enjoyed chilled, but if you prefer it slightly warmer, let it sit at room temperature for 15-20 minutes before eating. Avoid microwaving as it can alter the texture of the pudding layer.
FAQs
Can I use a homemade cake instead of a mix?
Absolutely! A homemade yellow cake or your favorite vanilla cake recipe works just as well and can add a personal touch to the Butterfinger Candy Bar Poke Cake.
What if I don’t have Butterfinger bars?
You can substitute with other crunchy candy bars like Heath, Skor, or even chopped peanut brittle for a similar texture and flavor profile.
Is this recipe suitable for kids?
Yes! The Butterfinger Candy Bar Poke Cake is a favorite for kids due to its sweetness and fun textures, but be mindful of choking hazards with very young children because of the crushed candy pieces.
Can I make this cake dairy-free?
With substitutions like dairy-free condensed milk, pudding, and whipped topping, this cake can be adapted for dairy-free diets while maintaining its deliciousness.
How long does it take to prepare this cake?
Preparation takes about 15-20 minutes, baking around 30 minutes, and chilling for a few hours, so plan ahead for the best results.
Final Thoughts
If you’re searching for a crowd-pleasing dessert that’s both decadent and easy to make, you’ll want to give the Butterfinger Candy Bar Poke Cake a try. Its combination of creamy, crunchy, and sweet layers makes every bite a joy. Pack your kitchen with a few simple ingredients, follow the easy steps, and get ready to impress your friends and family with this irresistible treat.
Related Posts
- Why Homemade Peach Ice Cream Is A Summer Must-Try
- Why Baby Lemon Impossible Pies Are a Must-Try Dessert
- Why Raspberry Lemon Tart Bars Are Irresistible

Butterfinger Candy Bar Poke Cake
- Total Time: 4 hours 50 minutes
- Yield: 12 servings 1x
- Diet: Can be adapted to Gluten Free
Description
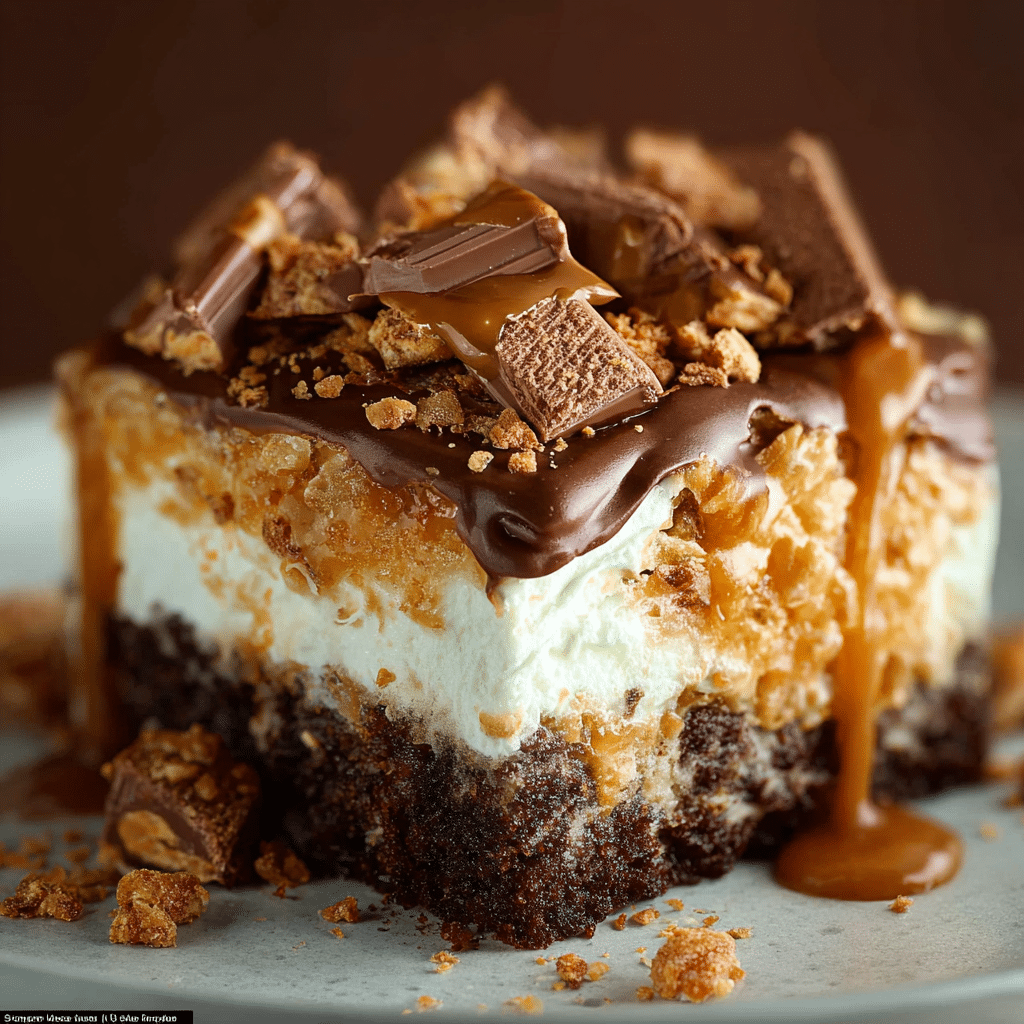
Butterfinger Candy Bar Poke Cake is a rich, creamy, and crunchy dessert that combines moist yellow cake with gooey sweetened condensed milk filling and crushed Butterfinger candy bars. Perfect for special occasions or casual treats, this poke cake offers a delightful blend of textures and flavors with an impressive layered presentation that is easy to prepare and customize.
Ingredients
Cake Ingredients
- 1 box yellow cake mix
- 3 large eggs
- 1/2 cup milk
- 1/2 cup butter, melted
Filling Ingredients
- 1 can (14 oz) sweetened condensed milk
- 1 cup crushed Butterfinger candy bars (about 3–4 bars)
Pudding Layer Ingredients
- 1 package (3.4 oz) instant vanilla pudding mix
- 2 cups cold milk
- 1 cup whipped topping (such as Cool Whip)
Topping
- 1/2 cup crushed Butterfinger candy bars
Instructions
- Step 1: Bake the cake Preheat your oven according to the cake mix package instructions. In a large bowl, combine the yellow cake mix, eggs, milk, and melted butter and mix until smooth. Pour the batter into a greased 9×13 inch baking pan and bake until a toothpick inserted into the center comes out clean, about 30 minutes. Let the cake cool slightly before proceeding.
- Step 2: Poke the cake Using the handle of a wooden spoon or a fork, poke holes evenly all over the surface of the warm cake. These holes will allow the filling to seep in and create the moist, creamy texture characteristic of poke cakes.
- Step 3: Pour the filling In a bowl, mix the sweetened condensed milk with the crushed Butterfinger candy bars. Gently pour this mixture evenly over the surface of the cake, ensuring the liquid fills the holes. Allow the cake to soak and cool completely.
- Step 4: Prepare the pudding layer Whisk together the instant vanilla pudding mix and cold milk until the pudding thickens, about 2 minutes. Fold in the whipped topping gently to keep the mixture light and fluffy. Spread this creamy pudding layer evenly over the soaked cake.
- Step 5: Add the candy topping Sprinkle the additional crushed Butterfinger candy bars evenly over the pudding layer for extra crunch and flavor. Refrigerate the cake for at least 4 hours or overnight to allow the layers to set beautifully before serving.
Notes
- Use room temperature eggs, milk, and butter for best mixing and a tender cake.
- Do not skip poking the cake to ensure the filling soaks properly.
- Crush candy bars gently to retain texture and crunch.
- Chill at least 4 hours or overnight for ideal texture and flavor.
- This cake can be made a day ahead and improves after resting.
- For variations, substitute yellow cake with chocolate cake or use gluten-free mixes as needed.
- Prep Time: 20 minutes
- Cook Time: 30 minutes
- Category: Dessert
- Method: Baking
- Cuisine: American
Nutrition
- Serving Size: 1 slice (1/12th of cake)
- Calories: 450 kcal
- Sugar: 40 g
- Sodium: 300 mg
- Fat: 20 g
- Saturated Fat: 10 g
- Unsaturated Fat: 8 g
- Trans Fat: 0.5 g
- Carbohydrates: 60 g
- Fiber: 1 g
- Protein: 5 g
- Cholesterol: 65 mg
Keywords: Butterfinger, poke cake, candy bar dessert, creamy cake, easy cake recipe, layered cake, party dessert