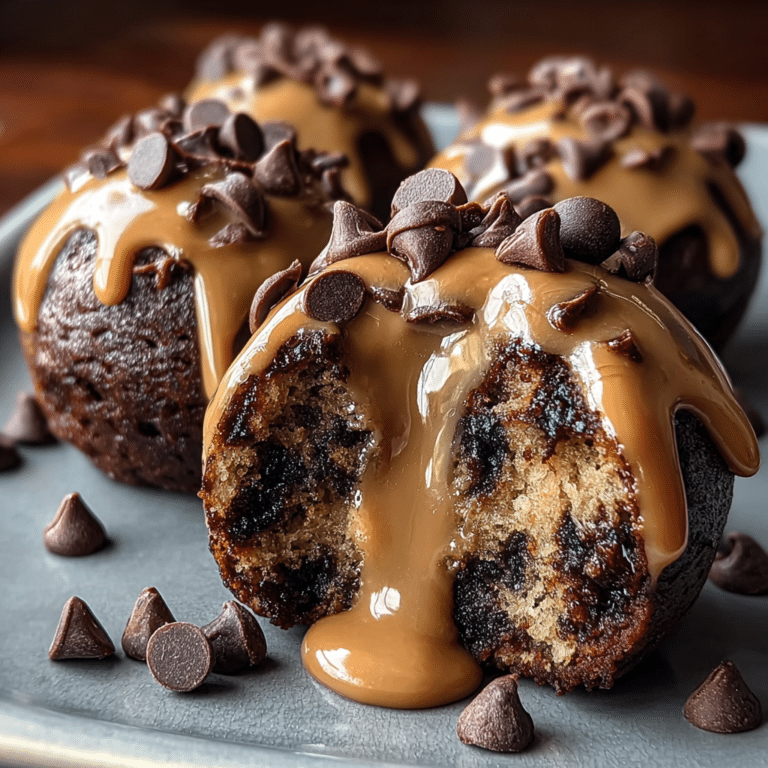
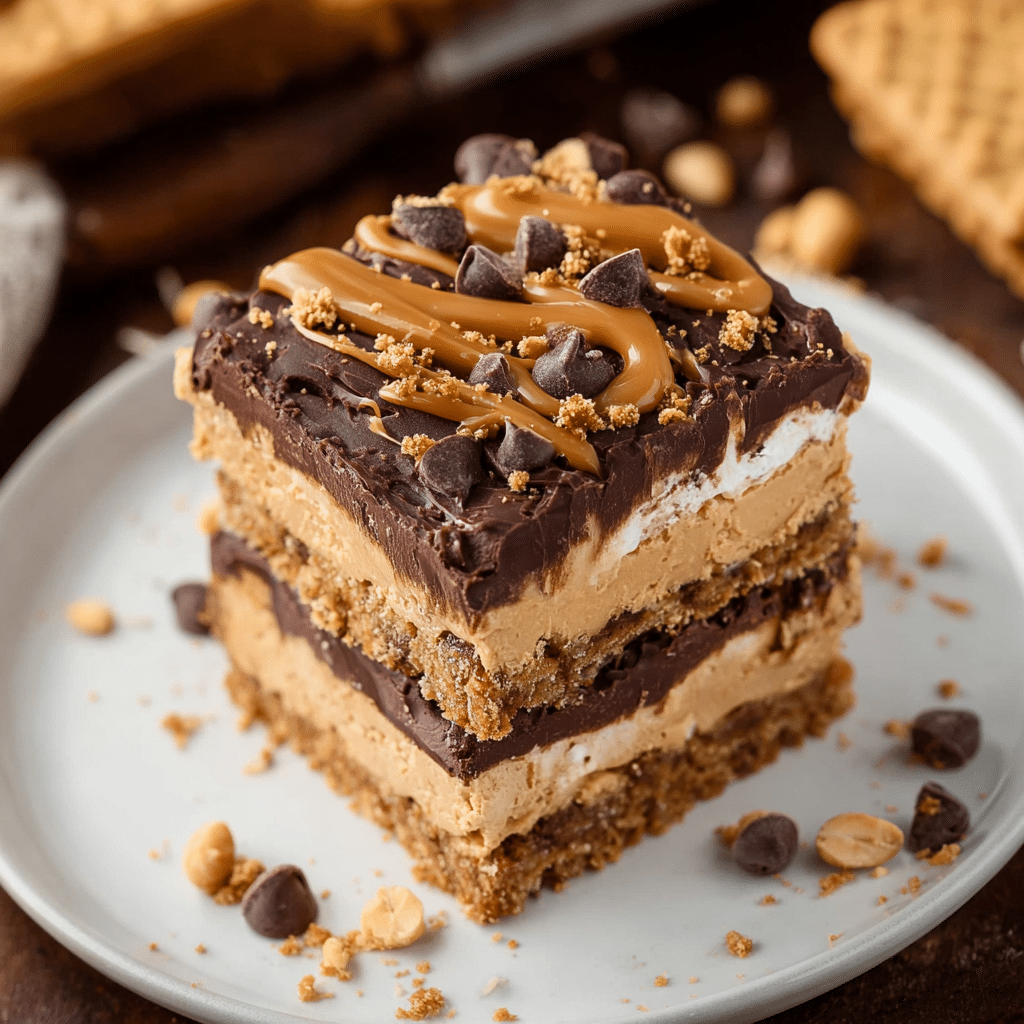
Easy Chocolate Peanut Butter Dream Bars Recipe
If you’re craving a dessert that feels like a warm hug and comes together in no time, you’re in the right place. Delight in rich, no-bake Chocolate Peanut Butter Dream Bars that are quick, creamy, and perfect for satisfying your sweet cravings. These dreamy bars blend velvety chocolate with luscious peanut butter in a way that’s both simple and irresistible, making them a go-to treat whether you’re new to baking or a dessert enthusiast looking for a fuss-free recipe.
Why You’ll Love This Recipe
- Easy Prep: Requires no oven time, letting you whip up a decadent treat in just minutes.
- Rich Flavor: Combines the perfect balance of creamy peanut butter and smooth chocolate that melts in your mouth.
- Customizable: Adapt ingredients to your preference, whether you want it more crunchy, nutty, or swirled with extra chocolate.
- Perfect Texture: Offers a soft yet slightly firm bite that’s satisfying without being heavy.
- Kid-Friendly: A sweet snack that everyone in the family can enjoy, perfect for parties or school treats.
Ingredients You’ll Need
These ingredients are simple yet essential, each adding its own magic to the creamy, dreamy texture and indulgent flavor of the Chocolate Peanut Butter Dream Bars.
- Peanut Butter: Choose creamy or crunchy depending on your texture preference, but natural is best for flavor.
- Chocolate Chips: Semisweet or milk chocolate chips melt beautifully and add a velvety richness.
- Butter: Adds smoothness and helps the bars set perfectly when chilled.
- Powdered Sugar: Sweetens the bars evenly without grittiness, contributing to that smooth finish.
- Graham Cracker Crumbs: Provide a subtle crunch and a hint of honeyed flavor to balance the sweetness.
- Vanilla Extract: Enhances the overall flavor with a warm and mellow note.
Variations for Chocolate Peanut Butter Dream Bars
One of the best things about these bars is how versatile they are—feel free to tweak the ingredients to match your taste buds or dietary needs without missing out on any of the dreaminess.
- Nut Alternatives: Swap peanut butter for almond or cashew butter for a different but equally delicious flavor profile.
- Gluten-Free Option: Use gluten-free graham cracker crumbs or crushed oats instead to keep it gluten-free without sacrificing texture.
- Nut-Free Version: Substitute peanut butter with sunflower seed butter to keep it allergy-friendly and tasty.
- Extra Crunch: Add chopped peanuts or pretzels for an irresistible nutty or salty crunch.
- Dairy-Free Adaptation: Use vegan butter and dairy-free chocolate chips to make it suitable for dairy-sensitive eaters.

How to Make Chocolate Peanut Butter Dream Bars
Step 1: Melt the Chocolate and Butter
In a microwave-safe bowl or over a double boiler, gently melt the chocolate chips and butter together, stirring frequently until smooth and fully combined. This creates that silky base that makes these bars feel indulgent.
Step 2: Mix in the Peanut Butter
Once the chocolate and butter are melted, stir in the peanut butter until completely smooth. Mixing while warm helps the peanut butter blend nicely, ensuring every bite is rich and creamy.
Step 3: Add Vanilla and Powdered Sugar
Next, blend in the vanilla extract followed by the powdered sugar. The powdered sugar sweetens and thickens the mixture, preparing it for the crumbly texture of the base.
Step 4: Incorporate Graham Cracker Crumbs
Gently fold in the graham cracker crumbs. This not only adds texture but also lightly balances the sweetness with a bit of crunch, making the bars satisfyingly substantial.
Step 5: Press into Pan and Chill
Transfer the mixture into a lined or greased square pan and press firmly to spread it evenly. Refrigerate for at least 2 hours or until the bars have completely set and are easy to cut into squares.
Pro Tips for Making Chocolate Peanut Butter Dream Bars
- Use Room Temperature Ingredients: Helps everything blend together smoothly without lumps.
- Press Firmly: Use the back of a spatula or your hands to press the mixture evenly in the pan so they hold together well.
- Don’t Skip Chilling: Refrigeration is key to setting the bars and getting the perfect texture.
- Choose Quality Chocolate: Good chocolate makes a big difference in flavor, so opt for your favorite brand.
- Cut Cleanly: Warm your knife under hot water and wipe dry before slicing to achieve clean edges.
How to Serve Chocolate Peanut Butter Dream Bars
Garnishes
A light dusting of powdered sugar, a sprinkle of crushed peanuts, or a drizzle of melted chocolate elevates the presentation and adds an extra touch of flavor that impresses every time.
Side Dishes
Serve with fresh berries for a burst of freshness or a scoop of vanilla ice cream to create a decadent dessert plate that complements the bars’ richness.
Creative Ways to Present
Try layering them with whipped cream and sliced bananas for a no-bake parfait or package them individually in cute cupcake liners for gift-giving or party treats that show extra care.
Make Ahead and Storage
Storing Leftovers
Keep the bars in an airtight container in the refrigerator for up to one week to maintain their creamy texture and rich flavor without drying out.
Freezing
Wrap bars individually in plastic wrap and place them in a freezer-safe container or bag. They freeze beautifully for up to 3 months and thaw quickly at room temperature.
Reheating
For a warm, gooey experience, microwave a bar for 10-15 seconds, but be careful not to overheat as the bars can melt and lose their structure.
FAQs
Can I use crunchy peanut butter for this recipe?
Absolutely! Crunchy peanut butter adds a delightful texture contrast and makes the bars even more interesting with little nutty bites throughout.
Are Chocolate Peanut Butter Dream Bars gluten-free?
They can be, if you swap regular graham cracker crumbs for a gluten-free alternative or use another base like crushed nuts or gluten-free cookies.
Do I have to refrigerate the bars before serving?
Yes, chilling the bars helps them set so they hold their shape when cut and eaten, ensuring the perfect creamy yet firm bite.
Can I use natural peanut butter that separates?
Yes, but be sure to stir it thoroughly before measuring, as the oils can affect the consistency if not evenly mixed.
How long do the bars last at room temperature?
It’s best to keep them refrigerated, but if left out, consume within 1-2 days to maintain freshness and prevent melting or spoilage.
Final Thoughts
There’s something truly special about the dreamy combination of chocolate and peanut butter, especially when it comes together effortlessly in the form of these Chocolate Peanut Butter Dream Bars. Whether you’re making them for a special occasion, a simple weekday treat, or a sweet gift, these bars will quickly become a favorite. I encourage you to whip up a batch, share them with loved ones, and enjoy every rich, creamy bite!
Related Posts
- Why Rhubarb Shortbread Bars Are Irresistible
- How to Make Easter M&M Cookie Bars Fast
- Why Pineapple Dump Cake Is a Must-Try Dessert

Chocolate Peanut Butter Dream Bars
- Total Time: 2 hours 10 minutes
- Yield: 16 bars 1x
- Diet: Gluten Free (when using gluten-free graham crumbs)
Description
No-bake Chocolate Peanut Butter Dream Bars are a quick, creamy dessert combining rich chocolate and luscious peanut butter into a soft yet slightly firm treat. Easy to prepare without an oven, these bars are perfect for satisfying sweet cravings with a balanced flavor and customizable texture, ideal for family snacks, parties, or gifting.
Ingredients
Main Ingredients
- 1 cup creamy or crunchy natural peanut butter
- 1 cup semisweet or milk chocolate chips
- 6 tablespoons butter
- 2 cups powdered sugar
- 1 1/2 cups graham cracker crumbs
- 1 teaspoon vanilla extract
Instructions
- Melt the Chocolate and Butter: In a microwave-safe bowl or over a double boiler, gently melt the chocolate chips and butter together, stirring frequently until smooth and fully combined. This creates a silky base for the bars.
- Mix in the Peanut Butter: Stir in the peanut butter while the chocolate and butter mixture is still warm until completely smooth, ensuring a rich and creamy blend.
- Add Vanilla and Powdered Sugar: Blend in the vanilla extract followed by the powdered sugar, which sweetens and thickens the mixture in preparation for the base.
- Incorporate Graham Cracker Crumbs: Gently fold in the graham cracker crumbs to add texture and balance the sweetness with a subtle crunch.
- Press into Pan and Chill: Transfer the mixture to a lined or greased square pan, pressing firmly to spread evenly. Refrigerate for at least 2 hours until bars are fully set and easy to cut.
Notes
- Use room temperature ingredients to ensure smooth blending without lumps.
- Press the mixture firmly into the pan for bars that hold together well.
- Chill the bars thoroughly; refrigeration is key for the ideal texture.
- Choose high-quality chocolate for better flavor.
- For clean cuts, warm your knife under hot water, dry it, then slice the bars.
- Prep Time: 10 minutes
- Cook Time: 0 minutes
- Category: Dessert
- Method: No-bake
- Cuisine: American
Nutrition
- Serving Size: 1 bar
- Calories: 250
- Sugar: 18g
- Sodium: 90mg
- Fat: 18g
- Saturated Fat: 7g
- Unsaturated Fat: 10g
- Trans Fat: 0g
- Carbohydrates: 20g
- Fiber: 2g
- Protein: 6g
- Cholesterol: 20mg
Keywords: Chocolate Peanut Butter Bars, No-bake Dessert, Peanut Butter Chocolate Treat, Easy Dessert, Gluten-free Dessert