Coconut Dream Bars
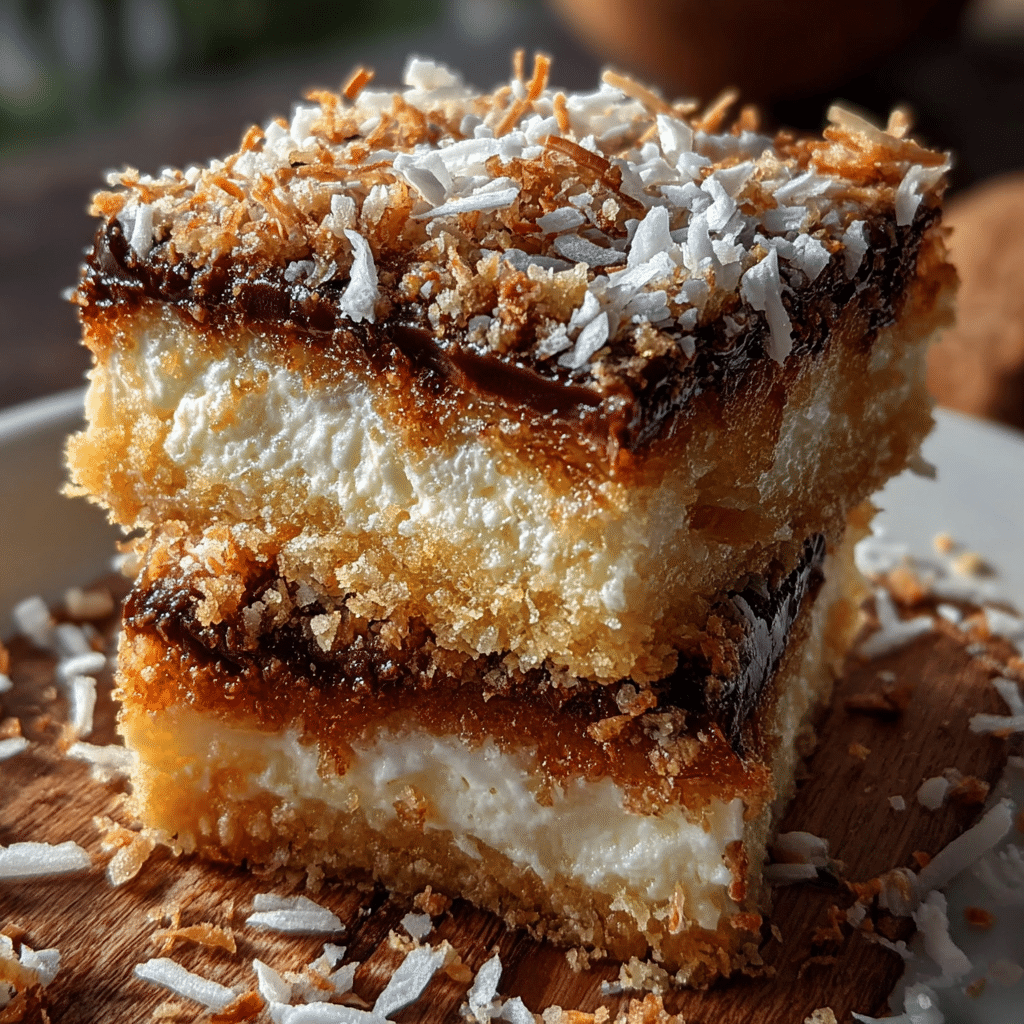
Discover the joy of creating Coconut Dream Bars, a sweet and creamy dessert that’s wonderfully simple and irresistibly delicious. These bars combine the rich flavors of coconut with a smooth texture that satisfies any dessert craving. Whether you’re new to baking or a seasoned pro, learning to make Coconut Dream Bars easily brings a delightful treat to your kitchen that everyone will love.
Why You’ll Love This Recipe
- Effortless preparation: The recipe uses simple steps that anyone can follow, ensuring success without stress.
- Deliciously creamy texture: Each bite melts in your mouth thanks to the perfect blend of creamy coconut and sweet layers.
- Versatile dessert: Coconut Dream Bars are great as a snack, party treat, or an elegant dessert for special occasions.
- Natural ingredients: This recipe focuses on wholesome ingredients that naturally complement each other without artificial additives.
- Customizable flavors: Easily modified to suit your personal tastes or dietary needs without losing the core Coconut Dream Bars experience.
Ingredients You’ll Need
This recipe keeps it straightforward with essential ingredients that bring out the best in Coconut Dream Bars. Each component plays a key role: adding sweetness, creating texture, or enhancing the flavor depth that makes these bars a standout dessert.
- Shredded coconut: The star ingredient delivering signature coconut flavor and chewy texture.
- Sweetened condensed milk: Provides creamy sweetness that binds the ingredients together beautifully.
- Butter: Adds richness and helps create a smooth, melt-in-your-mouth experience.
- Vanilla extract: Elevates the flavors with a warm, fragrant touch.
- Graham cracker crumbs: Forms a crunchy base layer for delightful contrast in every bite.
- Powdered sugar: Lightly dusted on top for an extra sweet finish and appealing look.
Variations for Coconut Dream Bars
Coconut Dream Bars are incredibly adaptable, making it simple to tweak or upgrade the recipe based on what you have on hand or dietary preferences. Here are some exciting ways to make this classic dessert uniquely yours.
- Chocolate layer: Add a melted chocolate topping for a rich and decadent twist.
- Nuts and seeds: Toss in chopped almonds or sunflower seeds for additional crunch and nutrition.
- Gluten-free base: Swap graham cracker crumbs with gluten-free cookies or oats to suit gluten sensitivities.
- Vegan version: Use coconut oil instead of butter and a plant-based condensed milk alternative.
- Fruit infusion: Mix in dried pineapple or mango bits to boost tropical flavor vibes.

How to Make Coconut Dream Bars
Step 1: Prepare the crust
Start by mixing the graham cracker crumbs with melted butter until evenly coated. Press this mixture firmly into the bottom of a lined baking pan to create a sturdy and flavorful base. Chill it while you work on the filling to ensure it sets nicely.
Step 2: Make the creamy coconut filling
Combine shredded coconut, sweetened condensed milk, and vanilla extract in a bowl. Stir thoroughly until all ingredients are well mixed and the coconut is fully coated, creating a luscious, sticky filling that’s ready to spread.
Step 3: Assemble the bars
Evenly layer the coconut filling over the chilled crust, spreading it smooth with a spatula. Ensure the filling covers the crust edge to edge for that perfect bite every time.
Step 4: Bake and cool
Bake the assembled bars in a preheated oven at 350°F (175°C) for about 25 minutes or until the top is golden and set. Once baked, allow the bars to cool completely before slicing into squares to hold their shape and enhance flavor.
Step 5: Final touches
Optionally, dust the cooled bars lightly with powdered sugar or drizzle melted chocolate on top for an elegant finish. Chill again if you added a chocolate layer for setting.
Pro Tips for Making Coconut Dream Bars
- Use fresh shredded coconut: Fresh or unsweetened coconut flakes provide the best texture and flavor.
- Press crust firmly: Ensure the crust is packed tightly to prevent crumbling during cutting or serving.
- Don’t skip chilling: Cooling the bars before slicing helps them hold together beautifully.
- Adjust sweetness: Taste the filling mixture before baking and add a bit more condensed milk if you prefer sweeter bars.
- Line your pan: Use parchment paper or foil for easy removal of the bars without breaking.
How to Serve Coconut Dream Bars
Garnishes
Finish the Coconut Dream Bars with light garnishes such as toasted coconut flakes, a sprinkle of powdered sugar, or a drizzle of caramel sauce to add visual appeal and an extra flavor boost.
Side Dishes
Pair these bars with a scoop of vanilla ice cream, fresh tropical fruit, or a cup of hot coffee to create a delightful dessert experience that balances sweetness with contrasting textures or temperatures.
Creative Ways to Present
Serve the bars on a decorative platter topped with edible flowers or cut into bite-sized pieces for a party platter. Wrapping individual bars in parchment paper with a ribbon makes for charming handheld treats perfect for gifting.
Make Ahead and Storage
Storing Leftovers
Store leftover Coconut Dream Bars in an airtight container in the refrigerator for up to 5 days to keep them fresh and moist. Avoid stacking bars directly on top of each other without separation to prevent sticking.
Freezing
Freeze the bars wrapped tightly in plastic wrap and foil for up to 3 months. Thaw overnight in the fridge before serving for the best texture and taste retention.
Reheating
If you prefer warm bars, gently reheat individual servings in the microwave for 15-20 seconds. Avoid overheating to keep the creamy texture intact.
FAQs
Can I use unsweetened coconut instead of shredded?
Yes, but the bars may be less sweet, so consider adding a bit more condensed milk or sugar to balance the flavor.
Are Coconut Dream Bars gluten-free?
Traditional recipes use graham cracker crumbs which contain gluten, but you can easily substitute with gluten-free cookies or oats to make the bars gluten-free.
Can I make these bars vegan?
Absolutely! Replace butter with coconut oil and use a vegan condensed milk alternative to keep the bars creamy and delicious without animal products.
How long do Coconut Dream Bars last?
Stored properly in the fridge, they stay fresh for up to 5 days and can be frozen for longer storage.
Can I add chocolate chips to the coconut filling?
Yes! Mixing in chocolate chips adds delightful bursts of chocolate throughout the bars, enhancing the overall flavor.
Final Thoughts
Making Coconut Dream Bars easily at home is a rewarding experience that brings sweet, creamy joy to your dessert table. This simple recipe is perfect for anyone who loves coconut and wants a quick, reliable way to satisfy their sweet tooth. Give it a try and watch how quickly these bars become a favorite for friends and family alike!
Related Posts
- Brown Butter Pumpkin Snickerdoodle Cookies Recipe
- Brown Butter Vanilla Bean Cheesecake Recipe
- Layered Chocolate Mousse Brownies

Coconut Dream Bars
- Total Time: 40 minutes
- Yield: 16 bars 1x
- Diet: Gluten Free (with gluten-free crust alternative)
Description
Coconut Dream Bars are a sweet and creamy dessert combining rich coconut flavor with a smooth texture and a crunchy graham cracker crust. This easy-to-make baked treat uses natural ingredients like shredded coconut, sweetened condensed milk, butter, and vanilla extract, making it a versatile snack or elegant dessert perfect for any occasion. Customize with chocolate, nuts, or fruit for your perfect flavor twist.
Ingredients
Crust Ingredients
- 1 1/2 cups graham cracker crumbs
- 6 tablespoons butter, melted
Filling Ingredients
- 3 cups shredded coconut (fresh or unsweetened preferred)
- 1 can (14 oz) sweetened condensed milk
- 1 teaspoon vanilla extract
Toppings (Optional)
- Powdered sugar, for dusting
- Melted chocolate, for drizzling
Instructions
- Prepare the crust: Mix the graham cracker crumbs with melted butter until evenly coated. Press the mixture firmly into the bottom of a lined baking pan to form a sturdy and flavorful base. Chill while preparing the filling to help it set well.
- Make the creamy coconut filling: In a bowl, combine shredded coconut, sweetened condensed milk, and vanilla extract. Stir thoroughly until all ingredients are well mixed and the coconut is fully coated, creating a luscious, sticky filling ready to spread.
- Assemble the bars: Evenly layer the coconut filling over the chilled crust, smoothing it out with a spatula. Make sure the filling covers the crust edge to edge for consistent bites.
- Bake and cool: Bake in a preheated oven at 350°F (175°C) for about 25 minutes or until the top is golden and set. Let the bars cool completely in the pan before slicing to ensure they hold their shape and develop flavor.
- Final touches: Optionally, dust the cooled bars lightly with powdered sugar or drizzle melted chocolate on top for an elegant finish. If adding chocolate, chill again to allow it to set before serving.
Notes
- Use fresh or unsweetened shredded coconut for best texture and flavor.
- Press the crust firmly to prevent crumbling during cutting or serving.
- Chill the bars before slicing to help them hold together beautifully.
- Adjust sweetness by tasting the filling before baking and adding more condensed milk if desired.
- Line your baking pan with parchment paper or foil for easy removal of the bars.
- Prep Time: 15 minutes
- Cook Time: 25 minutes
- Category: Dessert
- Method: Baking
- Cuisine: American
Nutrition
- Serving Size: 1 bar
- Calories: 220
- Sugar: 18g
- Sodium: 90mg
- Fat: 12g
- Saturated Fat: 9g
- Unsaturated Fat: 3g
- Trans Fat: 0g
- Carbohydrates: 25g
- Fiber: 2g
- Protein: 3g
- Cholesterol: 30mg
Keywords: Coconut dessert, Coconut bars, Easy baking, Creamy coconut bars, Gluten-free bars, No-bake crust alternative