Why Fruity Pebbles Cheesecake Tacos Are a Must-Try
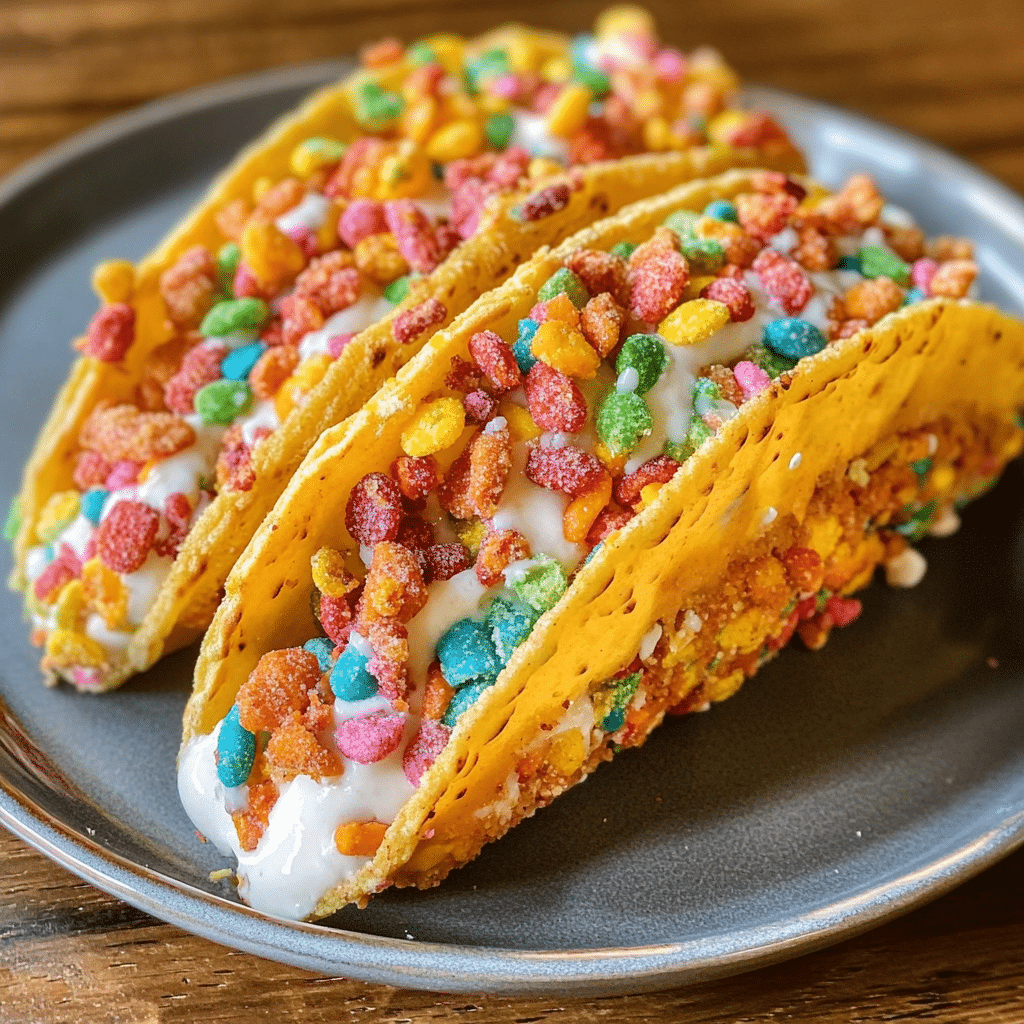
If you’re craving a dessert that’s colorful, creamy, and bursting with nostalgic fun, Fruity Pebbles Cheesecake Tacos are exactly what you need. This delightful treat combines the creamy richness of cheesecake with the vibrant crunch of Fruity Pebbles cereal, all wrapped in a fun taco shape. Whether you’re making a special snack for friends or just treating yourself, Fruity Pebbles Cheesecake Tacos deliver a flavor explosion that’s both playful and irresistible. They’re simple to make, packed with texture, and perfect for anyone who loves a sweet twist on classic desserts.
Why You’ll Love This Recipe
- Bright and Cheerful: The colorful Fruity Pebbles cereal adds a joyful pop that instantly lifts your mood.
- Creamy and Crunchy: The smooth cheesecake filling contrasts perfectly with the crispy taco shells.
- Fun to Make: It’s a playful recipe that’s easy for all ages to enjoy making in the kitchen.
- Customizable: You can tweak flavors and toppings to fit dietary preferences or creative cravings.
- Perfect Portions: These tacos are individually sized, which makes for neat serving and less mess.
Ingredients You’ll Need
When it comes to Fruity Pebbles Cheesecake Tacos, the ingredients are straightforward but crucial to achieving the perfect balance of flavor, texture, and color. Each component plays a role—from the creamy filling to the crunchy colorful coating that makes this dish so memorable.
- Fruity Pebbles Cereal: Adds a vibrant crunch and a burst of fruity flavor that defines this dessert.
- Cream Cheese: The star of the cheesecake filling, giving it that velvety smooth texture.
- Whipped Cream: Lightens the filling for a fluffy, airy consistency.
- Sugar: Adds just the right amount of sweetness to balance the tang of cream cheese.
- Vanilla Extract: Enhances the overall flavor, offering a warm and inviting aroma.
- Mini Taco Shells or Waffle Cones: Acts as the base to hold everything together, providing easy-to-handle taco shapes.
Variations for Fruity Pebbles Cheesecake Tacos
The great thing about Fruity Pebbles Cheesecake Tacos is how easy it is to customize. Whether you want to switch up the flavor profile or make them align with dietary needs, there’s always a delightful twist waiting to be explored.
- Dairy-Free Option: Use dairy-free cream cheese and whipped toppings for a vegan-friendly dessert.
- Chocolate Drizzle: Add melted dark or white chocolate on top for an extra indulgent touch.
- Mixed Berry Topping: Fresh strawberries, blueberries, or raspberries can add freshness and more vibrant color.
- Alternative Cereals: Swap Fruity Pebbles for Fruity Loops or a gluten-free cereal to accommodate preferences.
- Crunch Booster: Mix crushed nuts or granola with the cereal for an added texture layer.

How to Make Fruity Pebbles Cheesecake Tacos
Step 1: Prepare the Cheesecake Filling
Start by beating the cream cheese with sugar until smooth and lump-free. Then, gently fold in the whipped cream and vanilla extract to create a light and creamy filling that spreads easily.
Step 2: Assemble the Taco Shells
Use mini waffle cones or pre-made taco shells to act as your dessert base. If using waffle cones, gently flatten them to create a shell shape that can hold the filling and toppings.
Step 3: Fill the Tacos
Use a spoon or piping bag to dollop the cheesecake filling into each shell. Make sure you evenly distribute it for consistent flavor in every bite.
Step 4: Coat with Fruity Pebbles
Press the outside of each filled taco into a bowl of Fruity Pebbles so they stick to the edges, adding crunch and vibrant color. Alternatively, sprinkle the cereal on top if preferred.
Step 5: Chill Before Serving
Place the tacos in the refrigerator for at least 30 minutes to let the filling firm up and ensure the flavors meld beautifully.
Pro Tips for Making Fruity Pebbles Cheesecake Tacos
- Chill the Cream Cheese: Ensure your cream cheese is softened but still cool for easier mixing and smooth texture.
- Use Fresh Whipped Cream: Homemade whipped cream offers superior lightness and flavor compared to store-bought.
- Press Gently: When coating with Fruity Pebbles, gently press to avoid crushing the cereal.
- Serve Immediately: For best texture and crunch, enjoy within a few hours of assembling.
- Experiment with Shells: Try sugar cones or cinnamon waffle cones to add new flavor dimensions.
How to Serve Fruity Pebbles Cheesecake Tacos
Garnishes
Top your tacos with fresh mint leaves, a drizzle of honey, or even a sprinkle of edible glitter for a festive look.
Side Dishes
Pair these cheesecake tacos with a scoop of vanilla ice cream or a fresh fruit salad to balance richness with brightness.
Creative Ways to Present
Serve the tacos upright in a taco holder or decorate a dessert platter with colorful sprinkles and edible flowers to wow your guests visually.
Make Ahead and Storage
Storing Leftovers
Keep any leftover Fruity Pebbles Cheesecake Tacos refrigerated in an airtight container for up to 2 days to maintain freshness.
Freezing
While the filling can be frozen, it’s best not to freeze after adding the cereal crust, as it may become soggy upon thawing.
Reheating
These tacos are best served cold, so avoid reheating. If needed, let them sit at room temperature for 10–15 minutes before serving for optimal texture.
FAQs
Can I use other cereals instead of Fruity Pebbles?
Absolutely! Cereals like Fruity Loops or even colorful rice crisps work well and give a similar fruity crunch.
Is this recipe gluten-free?
Using gluten-free waffle cones or taco shells and verifying the cereal is gluten-free can make this recipe safe for gluten-sensitive individuals.
How long do Fruity Pebbles Cheesecake Tacos last?
They are best enjoyed within 2 days when refrigerated, as the cereal crunchiness decreases over time.
Can I make this recipe vegan?
Yes, by substituting dairy cream cheese and whipped cream with their vegan alternatives, you can enjoy a fully vegan-friendly dessert.
What’s the best way to serve these at a party?
Display them upright in taco holders or arrange creatively on trays with complementary garnishes for an eye-catching dessert station.
Final Thoughts
Fruity Pebbles Cheesecake Tacos combine fun, flavor, and nostalgia into a single, joyful bite. They’re easy to whip up, exciting to eat, and perfect for gatherings big or small. If you love colorful desserts that deliver on taste and presentation, you’re going to adore this recipe. Grab your ingredients, rally your friends, and create some memorable moments with these irresistible cheesecake tacos.
Related Posts
- Why Greek Yogurt Brownies Are a Must-Try Treat
- Quick & Easy Funnel Cake Bites You’ll Love
- Why Old Fashioned Chocolate Meringue Pie Wins Hearts

Fruity Pebbles Cheesecake Tacos
- Total Time: 45 minutes (including chilling time)
- Yield: 8-10 mini cheesecake tacos 1x
- Diet: Gluten Free (when using gluten-free shells and cereal)
Description
Fruity Pebbles Cheesecake Tacos are a colorful, creamy, and playful dessert that combines a smooth cheesecake filling with the vibrant crunch of Fruity Pebbles cereal in fun taco-shaped shells. Perfectly portioned and easy to make, they offer a nostalgic flavor explosion that is customizable for various dietary preferences.
Ingredients
Filling
- 8 oz cream cheese, softened
- 1/4 cup sugar
- 1/2 cup whipped cream
- 1 tsp vanilla extract
Shells & Coating
- Mini waffle cones or mini taco shells (quantity as needed for serving)
- 1 cup Fruity Pebbles cereal (for coating)
Instructions
- Prepare the Cheesecake Filling: Beat the softened cream cheese with sugar until smooth and lump-free. Gently fold in whipped cream and vanilla extract to create a light and creamy filling that spreads easily.
- Assemble the Taco Shells: Use mini waffle cones or pre-made taco shells as your dessert base. If using waffle cones, gently flatten them into a taco shell shape that holds filling and toppings.
- Fill the Tacos: Spoon or pipe the cheesecake filling evenly into each shell to ensure consistent flavor in every bite.
- Coat with Fruity Pebbles: Press the outside edges of each filled taco into a bowl of Fruity Pebbles cereal so they stick, adding crunch and vibrant color. Alternatively, sprinkle cereal on top if preferred.
- Chill Before Serving: Refrigerate the assembled tacos for at least 30 minutes to let the filling firm up and flavors meld beautifully.
Notes
- Chill the cream cheese until softened but cool for easier mixing and smooth texture.
- Use fresh homemade whipped cream for superior lightness and flavor.
- Press the Fruity Pebbles gently to avoid crushing the cereal.
- Serve the tacos within a few hours of assembling for the best texture and crunch.
- Experiment with different shells such as sugar cones or cinnamon waffle cones for new flavor dimensions.
- Store leftovers in an airtight container in the refrigerator for up to 2 days.
- Freeze the cheesecake filling separately if desired, but avoid freezing once cereal coating is applied to prevent sogginess.
- Serve tacos cold; if needed, let sit at room temperature 10-15 minutes before eating.
- Prep Time: 15 minutes
- Cook Time: 0 minutes
- Category: Appetizers
- Method: No Bake
- Cuisine: American
Nutrition
- Serving Size: 1 mini taco
- Calories: 150
- Sugar: 12g
- Sodium: 75mg
- Fat: 9g
- Saturated Fat: 5g
- Unsaturated Fat: 3g
- Trans Fat: 0g
- Carbohydrates: 14g
- Fiber: 0.5g
- Protein: 2g
- Cholesterol: 30mg
Keywords: Fruity Pebbles, cheesecake tacos, no bake dessert, colorful dessert, mini cheesecake, fun dessert, gluten-free dessert, easy cheesecake, kids dessert