Peanut Butter Blossom Bars
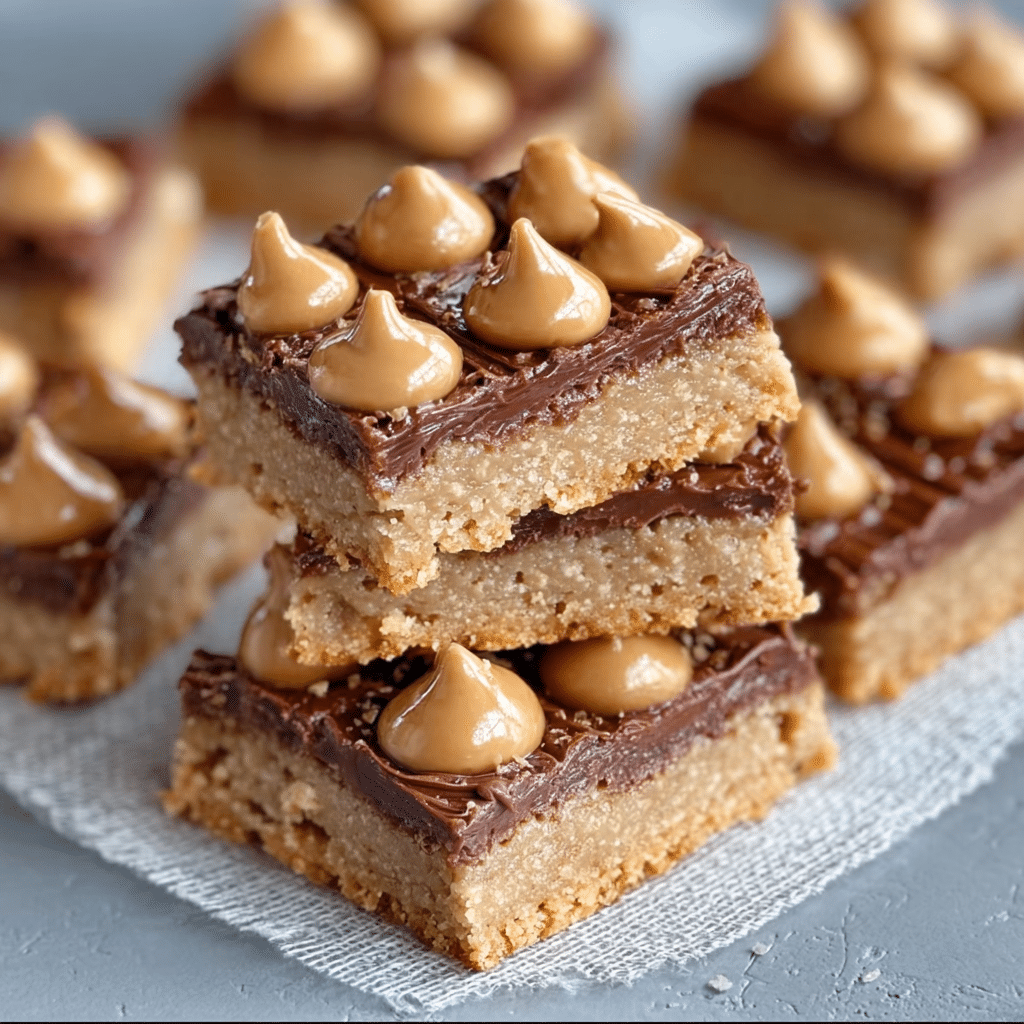
If you’re craving a dessert that’s chewy, chocolatey, and packed with peanut buttery goodness, then you’ve just hit the jackpot with this Peanut Butter Blossom Bars recipe. These bars combine the classic charm of peanut butter cookie dough with the irresistible touch of a chocolate kiss right in the center, creating a treat that’s perfect for family gatherings, holidays, or just an everyday indulgence. Easy to make and even easier to love, Peanut Butter Blossom Bars strike that perfect balance of soft texture and rich flavor, making them an all-time favorite for any sweet tooth.
Why You’ll Love This Recipe
- Classic Comfort: Delivers that familiar peanut butter and chocolate combination everyone adores.
- Chewy and Soft Texture: Balanced chewiness keeps every bite delightfully satisfying, not dry or crumbly.
- Simple Ingredients: Uses pantry staples, so you don’t have to run to the store for specialty items.
- Perfect for Any Occasion: Whether it’s a party, holiday, or daily treat, these bars fit right in.
- Quick and Easy Preparation: No complicated steps make these ideal for bakers of all skill levels.
Ingredients You’ll Need
Each ingredient in this recipe plays a crucial role in building the perfect Peanut Butter Blossom Bars — from flavor to texture to appearance. Keeping it simple allows the peanut butter and chocolate to shine beautifully.
- All-Purpose Flour: Provides the structure needed for chewy bars.
- Baking Soda: Gives the bars a slight lift without compromising chewiness.
- Salt: Enhances all the flavors and balances the sweetness.
- Butter: Adds richness and tenderness to the texture.
- Granulated Sugar: Sweetens the dough with a bit of crunch.
- Brown Sugar: Boosts moisture and adds deep caramel notes.
- Peanut Butter: The star ingredient giving that unmistakable creamy and nutty flavor.
- Egg: Binds everything together while adding softness.
- Vanilla Extract: Brings warmth and depth to the flavor profile.
- Chocolate Kisses (or Chocolate Chips): The signature chocolate centerpiece that melts during baking.
Variations for Peanut Butter Blossom Bars
This recipe offers a fantastic foundation that’s easy to adapt depending on your preferences or dietary needs. Feel free to experiment with these variations to make it truly your own!
- Nut-Free Option: Substitute peanut butter with sunflower seed butter for those with allergies.
- Dark Chocolate Kisses: Use dark chocolate centers for a richer, less sweet contrast.
- Add Sea Salt: Sprinkle a little flaky sea salt on top for a trendy salty-sweet combo.
- Mini Chocolate Chips: Mix mini chips into the dough for bursts of chocolate beyond the center.
- Gluten-Free Alternative: Replace flour with a gluten-free blend to accommodate dietary restrictions.

How to Make Peanut Butter Blossom Bars
Step 1: Prepare the Oven and Baking Pan
Preheat your oven to 350°F (175°C) and line a 9×13-inch baking pan with parchment paper or lightly grease it to prevent sticking and ensure easy removal.
Step 2: Mix Dry Ingredients
In a medium bowl, whisk together the all-purpose flour, baking soda, and salt. This ensures even distribution and prevents clumps in your dough.
Step 3: Cream Butter and Sugars
Using a stand or hand mixer, beat the butter, granulated sugar, and brown sugar until light and fluffy. This step creates that tender crumb and depth of sweetness.
Step 4: Add Peanut Butter, Egg, and Vanilla
Mix in the peanut butter until fully combined, then incorporate the egg and vanilla extract. These add richness and help bind the bars together.
Step 5: Combine Wet and Dry Mixtures
Gradually add the flour mixture to the wet ingredients, mixing just until everything is blended – avoid overmixing to keep the bars soft.
Step 6: Spread Batter and Add Chocolate Kisses
Spread the dough evenly in the prepared pan, then gently press the chocolate kisses into the surface, spacing them evenly throughout the batter.
Step 7: Bake and Cool
Bake in the preheated oven for 20-25 minutes, or until the edges are golden and a toothpick inserted near the edge comes out clean. Allow bars to cool completely in the pan before cutting.
Pro Tips for Making Peanut Butter Blossom Bars
- Chill the Dough: Refrigerate the dough for 30 minutes to prevent spreading and maintain a thick bar.
- Use Room Temperature Butter: Softened butter creams better with sugar, creating a lighter texture.
- Don’t Overbake: Bake until just done to keep the chewiness intact and avoid dryness.
- Even Chocolate Placement: Space the chocolate kisses evenly for balanced chocolate in every bite.
- Use Parchment Paper: Helps in lifting bars from the pan easily and protects from burning underneath.
How to Serve Peanut Butter Blossom Bars
Garnishes
Enhance each bar by sprinkling a pinch of flaky sea salt or drizzling melted peanut butter or chocolate over the top for added texture and flavor.
Side Dishes
Serve alongside a cold glass of milk or a scoop of vanilla ice cream to complement the rich, nutty taste with refreshing creaminess.
Creative Ways to Present
Cut into squares and stack on decorative platters, or use cupcake liners for individual servings perfect for parties or gift boxes.
Make Ahead and Storage
Storing Leftovers
Store any leftover Peanut Butter Blossom Bars in an airtight container at room temperature for up to 4 days to maintain freshness and moisture.
Freezing
Wrap bars tightly in plastic wrap and foil, or place in a freezer-safe bag, then freeze for up to three months. Thaw overnight in the fridge before serving.
Reheating
Warm bars slightly in the microwave for 10-15 seconds to bring back softness and melt the chocolate centers just a bit without overheating.
FAQs
Can I use natural peanut butter in this recipe?
Yes, natural peanut butter works but may change texture slightly; its thinner consistency can result in softer bars, so you might want to chill the dough before baking.
What if I don’t have chocolate kisses?
You can substitute with regular chocolate chips or chunks, though the iconic look of peanut butter blossoms comes from the kiss shape, so consider that for presentation.
Is this recipe gluten-free?
Not as-is, but you can easily swap all-purpose flour for a gluten-free baking blend to accommodate gluten sensitivities without losing flavor or texture.
How long do Peanut Butter Blossom Bars stay fresh?
Stored properly at room temperature, they stay fresh for 3 to 4 days; refrigerating can extend life but may dry them out.
Can I double the recipe?
Absolutely! Just double all ingredients and use a larger baking pan or multiple pans, adjusting baking time accordingly by checking doneness frequently.
Final Thoughts
Peanut Butter Blossom Bars are a delightful, dependable crowd-pleaser that blend nostalgic flavors with a chewy, chocolate-centered finish you’ll find yourself making again and again. Whether you enjoy them fresh out of the oven or as an anytime snack, these bars deliver warmth and sweetness with every bite. Go ahead and give this recipe a try—your taste buds will thank you!
Related Posts
- Chocolate Caramel Marshmallow Whiskey & Bacon Bark
- Mint Chocolate Chip Protein Balls
- Cherry Blossom Mousse Domes
Peanut Butter Blossom Bars
- Total Time: 40 minutes
- Yield: 36 bars 1x
- Diet: Can be made gluten-free with flour substitution
Description
Peanut Butter Blossom Bars are chewy, chocolate-centered bars that combine the classic peanut butter cookie flavor with melty chocolate kisses in every bite. Perfect for family gatherings, holidays, or everyday indulgence, this easy-to-make recipe balances soft texture and rich flavor for a timeless dessert treat.
Ingredients
Dry Ingredients
- 2 1/2 cups all-purpose flour
- 1 teaspoon baking soda
- 1/2 teaspoon salt
Wet Ingredients
- 1 cup (2 sticks) unsalted butter, softened
- 1 cup granulated sugar
- 1 cup brown sugar, packed
- 1 cup creamy peanut butter
- 1 large egg
- 1 teaspoon vanilla extract
Toppings
- 36 chocolate kisses (or chocolate chips)
Instructions
- Prepare the Oven and Baking Pan: Preheat your oven to 350°F (175°C) and line a 9×13-inch baking pan with parchment paper or lightly grease it to prevent sticking and ensure easy removal.
- Mix Dry Ingredients: In a medium bowl, whisk together the all-purpose flour, baking soda, and salt. This ensures even distribution and prevents clumps in your dough.
- Cream Butter and Sugars: Using a stand or hand mixer, beat the softened butter, granulated sugar, and brown sugar until light and fluffy. This step creates a tender crumb and depth of sweetness.
- Add Peanut Butter, Egg, and Vanilla: Mix in the peanut butter until fully combined, then incorporate the egg and vanilla extract. These add richness and help bind the bars together.
- Combine Wet and Dry Mixtures: Gradually add the flour mixture to the wet ingredients, mixing just until blended – avoid overmixing to keep the bars soft.
- Spread Batter and Add Chocolate Kisses: Spread the dough evenly in the prepared pan, then gently press the chocolate kisses into the surface, spacing them evenly throughout the batter.
- Bake and Cool: Bake in the preheated oven for 20-25 minutes, or until the edges are golden and a toothpick inserted near the edge comes out clean. Allow bars to cool completely in the pan before cutting.
Notes
- Chill the dough for 30 minutes to prevent spreading and maintain a thick bar.
- Use room temperature butter for better creaming with sugars.
- Don’t overbake to keep the bars chewy and moist.
- Space the chocolate kisses evenly for balanced chocolate in every bite.
- Use parchment paper to help lift bars easily and protect from burning underneath.
- Prep Time: 15 minutes
- Cook Time: 20-25 minutes
- Category: Desserts
- Method: Baking
- Cuisine: American
Nutrition
- Serving Size: 1 bar
- Calories: 220
- Sugar: 18g
- Sodium: 110mg
- Fat: 13g
- Saturated Fat: 6g
- Unsaturated Fat: 6g
- Trans Fat: 0g
- Carbohydrates: 22g
- Fiber: 1g
- Protein: 5g
- Cholesterol: 30mg
Keywords: peanut butter bars, chocolate kiss bars, peanut butter dessert, chewy peanut butter bars, holiday dessert, easy baking