Valentine’s Day Oreo Pops Recipe
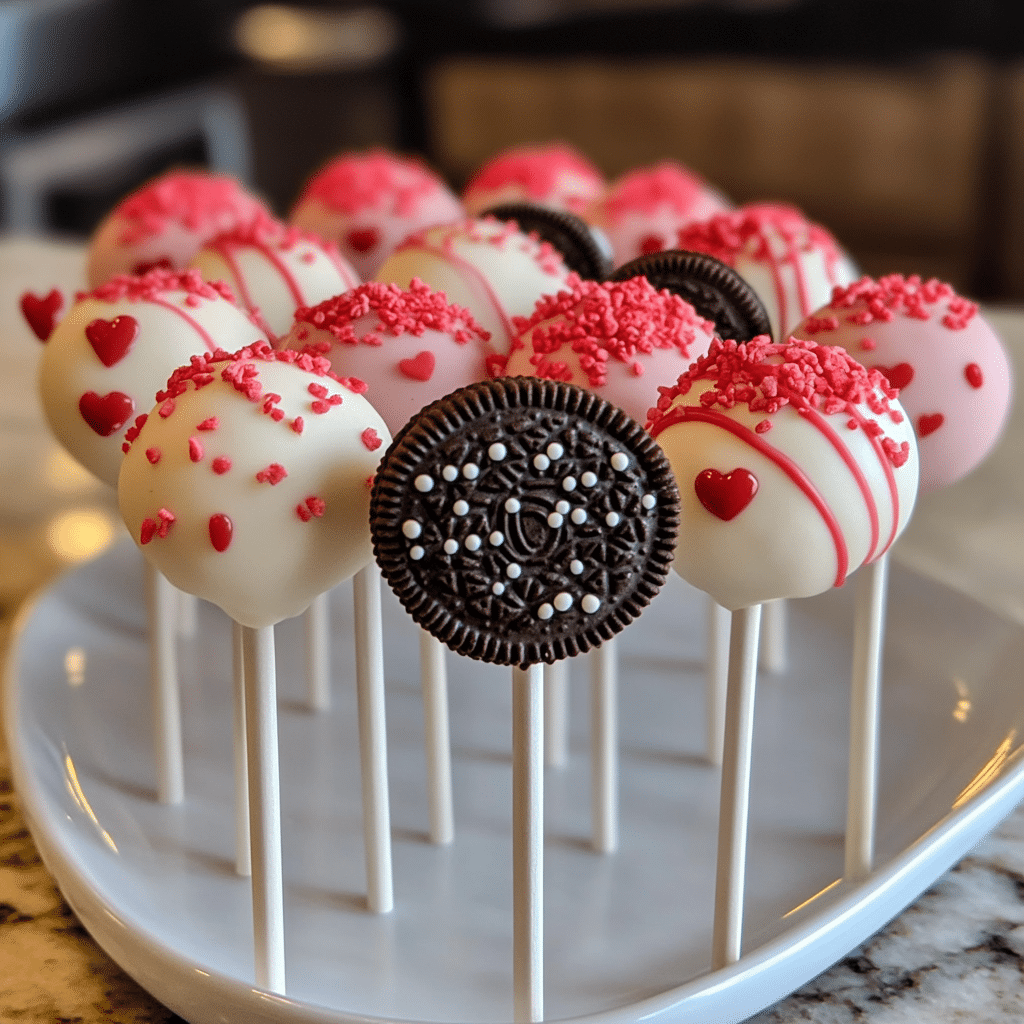
If you’re looking for a sweet and simple way to celebrate the season of love, you’ll adore this Valentine’s Day Oreo Pops Recipe. These adorable, bite-sized treats combine classic Oreo cookies with festive coatings and fun decorations, making them the perfect DIY dessert to share or gift. Whether you’re hosting a party or just craving a special snack, this recipe is easy to whip up, delightfully customizable, and guaranteed to add a touch of whimsy to your Valentine’s Day celebrations.
Why You’ll Love This Recipe
- Simplicity at its best: This Valentine’s Day Oreo Pops Recipe uses just a handful of ingredients and minimal steps, perfect for all skill levels.
- Quick and fun: It’s ready in under 30 minutes, making it an ideal last-minute treat or party favor.
- Customizable creativity: You can easily switch up colors, toppings, and drizzle designs to match your vibe.
- Family-friendly activity: Kids will love helping you dip and decorate every pop, creating memorable bonding moments.
- Perfect for gifting: Wrap them up beautifully and you’ve got an irresistible homemade Valentine’s Day gift.
Ingredients You’ll Need
For a Valentine’s Day Oreo Pops Recipe that’s both delicious and visually stunning, the ingredients are straightforward but integral to achieve the perfect taste and presentation. Each element adds flavor, texture, or festive color that makes these pops irresistible.
- Oreos: Classic chocolate sandwich cookies serve as the base, providing crunch and rich flavor.
- White candy melts: These create the smooth, creamy coating that’s easy to decorate and beautifully festive in white or tinted pink/red.
- Red or pink sprinkles: Sprinkle over the coating to add color, texture, and a pop of celebration to each bite.
- Lollipop sticks: These hold the Oreo securely and make eating and gifting hassle-free and mess-free.
- Optional chocolate drizzle: Use milk or dark chocolate to add contrast and a gourmet touch to the finished pops.
Variations for Valentine’s Day Oreo Pops Recipe
The beauty of this Valentine’s Day Oreo Pops Recipe is how easy it is to tweak according to your taste or dietary needs. Feel free to get creative with flavors, decorations, and even cookie types to make these uniquely yours.
- Flavor swap: Try using different Oreo flavors like mint or birthday cake for an unexpected twist.
- Vegan option: Use dairy-free candy melts and vegan Oreos to keep this treat plant-friendly.
- Nutty crunch: Add crushed nuts to the coating for extra texture and a savory note.
- Colorful coatings: Mix candy melts in pastel or vibrant shades to match any party aesthetic or mood.
- Personalized messages: Use edible markers or small candy letters to write sweet notes on each pop.

How to Make Valentine’s Day Oreo Pops Recipe
Step 1: Prepare Your Workspace
Lay out parchment paper on a baking tray or flat surface and insert a lollipop stick gently into the cream filling of each Oreo, ensuring it’s secure but not broken.
Step 2: Melt the Candy Coating
Using a microwave-safe bowl, melt the white candy melts in 30-second increments, stirring each time until smooth and creamy, perfect for dipping.
Step 3: Dip the Oreo Pops
Hold each Oreo pop by the stick and dip it into the melted candy until fully coated, allowing any excess to drip off before placing them on the parchment paper.
Step 4: Decorate Quickly
Before the coating sets, sprinkle your Valentine’s-themed sprinkles or add other decorations to personalize your pops with sparkling charm.
Step 5: Add Drizzles or Final Touches
Once the coating has hardened slightly, use melted milk or dark chocolate in a piping bag or ziplock corner to drizzle fine lines for an elegant finish.
Pro Tips for Making Valentine’s Day Oreo Pops Recipe
- Keep candy melts dry: Even a drop of water can cause candy melts to seize, so make sure your tools and Oreos are dry.
- Use good-quality candy melts: This ensures a smooth coating that hardens beautifully and isn’t grainy.
- Work in a cool environment: It helps the coating set faster and prevents melting while decorating.
- Secure lollipop sticks carefully: Insert gently but firmly to avoid breaking the cream center or crumbs falling out.
- Chill pops briefly: Place them in the fridge for 10 minutes to speed up the hardening process between dipping and decorating steps.
How to Serve Valentine’s Day Oreo Pops Recipe
Garnishes
Garnish each pop with festive sprinkles, crushed freeze-dried strawberries, or edible glitter for a sparkly, romantic look that’s as fun to admire as to eat.
Side Dishes
Pair these sweet pops with fresh fruits like strawberries or raspberries, a scoop of vanilla ice cream, or even a warm cup of cocoa to enhance the cozy Valentine’s Day vibe.
Creative Ways to Present
Arrange the Oreo pops upright in a decorated foam block wrapped with tissue paper, or bundle them with ribbons in clear treat bags to create charming favors or dessert table centerpieces.
Make Ahead and Storage
Storing Leftovers
Keep the Oreo pops fresh by storing them in an airtight container at room temperature away from direct sunlight; they stay perfect for up to 3 days.
Freezing
If you want to save them for later, wrap each pop in plastic wrap and freeze them in a sealed bag; thaw at room temperature before serving to avoid condensation.
Reheating
These treats don’t require reheating, but if the coating softens, simply cool the pops in the fridge briefly to firm them up again before enjoying.
FAQs
Can I use other cookies instead of Oreos?
Absolutely! You can substitute Oreos with any sandwich cookie or even homemade cookies that have a sturdy filling, though Oreos remain the easiest and most classic choice.
How long do Valentine’s Day Oreo Pops last?
When stored properly at room temperature, they stay fresh for about 3 days, but they can last up to a week if kept in a cool, dry place.
What if I don’t have candy melts?
You can carefully melt white chocolate chips instead, but be cautious of overheating since white chocolate is more prone to burning.
Can I make these without a microwave?
Yes, melt the candy melts using a double boiler on the stovetop for even heat distribution and prevent burning.
Are these pops suitable for children?
Definitely! They are a fun and mess-free treat that kids can even help decorate, just supervise with the melted candy for safety.
Final Thoughts
This Valentine’s Day Oreo Pops Recipe is the ultimate crowd-pleaser for anyone who loves easy and celebratory sweets. The mix of creamy coating, crunchy cookies, and festive colors makes every bite a joyful moment. Whether you’re making these for yourself, friends, or sweethearts, they’re sure to bring smiles and warmth to your Valentine’s Day. So grab your ingredients, get creative, and enjoy this simple, delicious treat that’s as fun to make as it is to share.
Related Posts
Print
Valentine’s Day Oreo Pops Recipe
- Total Time: 25 minutes
- Yield: 12 Oreo Pops
- Diet: Vegetarian
Description
Celebrate Valentine’s Day with these easy and adorable Oreo Pops. Combining classic Oreo cookies with creamy white candy melts and festive decorations, these pops are a quick, customizable, and fun treat perfect for gifting or sharing at any party. Ready in under 30 minutes, they provide a delightful mix of crunch, sweetness, and whimsy for all ages.
Ingredients
Base
- Classic Oreo cookies (quantity as desired)
- Lollipop sticks (one per Oreo)
Coating
- White candy melts (enough to fully dip all Oreo pops)
- Red or pink sprinkles (for decoration)
Optional
- Milk or dark chocolate (for drizzle)
Instructions
- Prepare Your Workspace: Lay out parchment paper on a baking tray or flat surface. Gently insert a lollipop stick into the cream filling of each Oreo, making sure it is secure but does not break the cookie.
- Melt the Candy Coating: In a microwave-safe bowl, melt the white candy melts in 30-second increments. Stir thoroughly after each interval until the coating is smooth and creamy.
- Dip the Oreo Pops: Hold each Oreo pop by the stick and dip it fully into the melted candy coating. Allow any excess coating to drip off, then place the pops on the parchment paper.
- Decorate Quickly: Before the coating sets, sprinkle the Oreo pops with Valentine’s-themed sprinkles or any other desired decorations to personalize each treat.
- Add Drizzles or Final Touches: Once the coating has slightly hardened, melt some milk or dark chocolate and use a piping bag or the corner of a ziplock bag to drizzle fine lines over the pops for an elegant finish.
Notes
- Keep candy melts dry to avoid seizing; ensure all tools and Oreos are dry before use.
- Use good-quality candy melts for smooth, beautiful coatings.
- Work in a cool environment to help the coating set faster and prevent melting during decoration.
- Insert lollipop sticks gently but firmly to avoid breaking the Oreo cream center.
- Chill the pops briefly in the fridge for about 10 minutes between dipping and decorating steps to speed up hardening.
- Prep Time: 10 minutes
- Cook Time: 15 minutes
- Category: Appetizers
- Method: No-bake
Nutrition
- Serving Size: 1 pop
- Calories: 120
- Sugar: 15g
- Sodium: 90mg
- Fat: 6g
- Saturated Fat: 4g
- Unsaturated Fat: 1g
- Trans Fat: 0g
- Carbohydrates: 18g
- Fiber: 1g
- Protein: 1g
- Cholesterol: 5mg
Keywords: Valentine's Day, Oreo Pops, candy melts, easy dessert, no bake, fun treat, party favor, homemade gift