Melting Moments
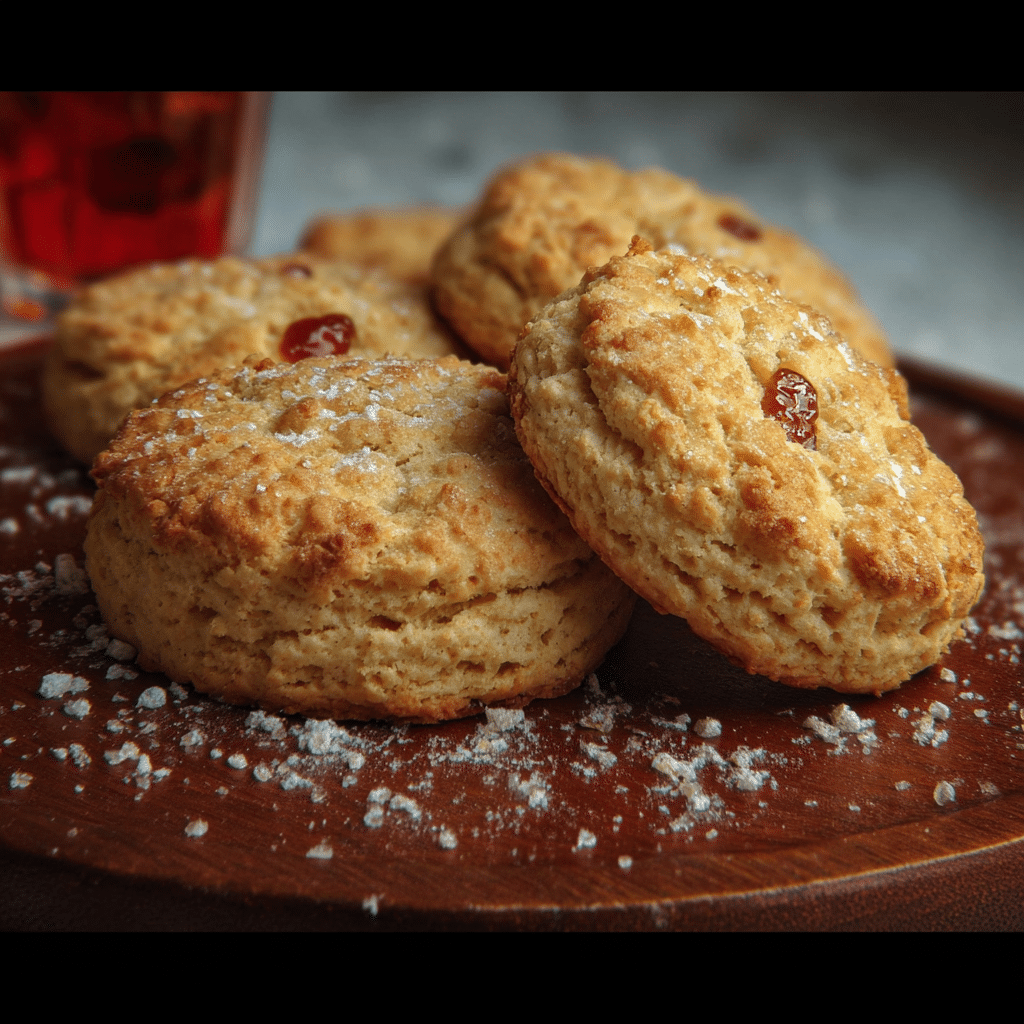
If you have ever bitten into a perfectly soft, buttery cookie that seems to dissolve on your tongue, you know the magic of Melting Moments. These delicate treats are a timeless favorite, beloved for their melt-in-the-mouth texture and subtle sweetness. Whether enjoyed with a cup of tea or shared at celebrations, our guide will help you master Melting Moments with simple ingredients and easy-to-follow steps that guarantee perfection every time. Learn the secret to soft, buttery Melting Moments cookies that melt in your mouth. Easy steps for perfect, irresistible treats every time!
Why You’ll Love This Recipe
- Incredibly Soft Texture: Melting Moments are known for their delicate, crumbly texture that simply melts on contact, offering a unique cookie experience.
- Simple Ingredients: Made with easy-to-find pantry staples, this recipe keeps baking approachable and stress-free.
- Perfect for Any Occasion: Whether it’s afternoon tea, a festive celebration, or just a cozy night in, these cookies never disappoint.
- Customizable Flavors: Easily add your favorite extracts or toppings to match your personal preference or dietary needs.
- Quick Preparation: Minimal active prep time combined with straightforward steps makes this recipe ideal even for beginner bakers.
Ingredients You’ll Need
Every ingredient in this Melting Moments recipe plays a critical role in creating its characteristic softness and buttery richness. Simple yet essential, these components combine to give you the ideal crumb that literally melts in your mouth.
- Butter: Unsalted butter at room temperature is key for that rich, creamy flavor and tender crumb.
- Icing Sugar: Fine icing sugar provides sweetness without graininess, ensuring smooth consistency.
- Cornflour (Cornstarch): This ingredient lightens the dough and is crucial for the melt-away texture.
- Plain Flour (All-Purpose): Adds structure while keeping the cookies soft and delicate.
- Vanilla Extract: Enhances flavor with a warm, inviting aroma that complements the buttery base.
- Salt: Just a pinch to balance and elevate the sweetness and richness.
Variations for Melting Moments
Melting Moments are wonderfully versatile; you can easily customize the recipe to fit your taste buds or dietary requirements. Whether you want to add a twist or keep it traditional, these variations help you make the recipe your own.
- Chocolate Dipped: Dip half of each cookie in melted dark or milk chocolate for an indulgent finish.
- Gluten-Free Version: Substitute the plain flour with a gluten-free blend for a celiac-friendly treat without losing texture.
- Citrus Zest: Add lemon or orange zest into the dough for a fresh, tangy flavor boost.
- Nutty Addition: Incorporate finely chopped nuts like macadamias or almonds for added crunch and taste.
- Fill Them Up: Sandwich two cookies together with jam or buttercream for a delightful filling surprise.

How to Make Melting Moments
Step 1: Prepare Your Ingredients and Equipment
Start by setting your butter out to soften at room temperature. Preheat your oven to 160°C (320°F). Line a baking tray with parchment paper to prevent sticking. Measure out and sift your dry ingredients for the best texture.
Step 2: Cream the Butter and Icing Sugar
Using a hand mixer or stand mixer, beat the softened butter and icing sugar together until the mixture is pale, smooth, and fluffy. This step is crucial as it creates air pockets that make the cookies light and tender.
Step 3: Mix in Vanilla and Dry Ingredients
Add vanilla extract to the creamed mixture. Then gently fold in the sifted plain flour and cornflour in batches. Avoid overmixing to keep the dough soft and crumbly rather than tough.
Step 4: Shape the Cookies
Roll the dough into small, even-sized balls—about 3 cm in diameter. Place them spaced apart on your baking tray, then gently flatten with the back of a fork or your hand to form discs.
Step 5: Bake to Perfection
Bake the cookies for 15 to 18 minutes until the edges are set but still pale. Avoid browning; the lighter appearance signals the ideal melt-in-the-mouth texture.
Step 6: Cool and Optional Decorating
Remove the cookies from the oven and let them cool completely on the tray, allowing them to firm up slightly. Optionally, dust with extra icing sugar or decorate with chocolate drizzle once cooled.
Pro Tips for Making Melting Moments
- Use Room Temperature Butter: Soft butter creams better with sugar, creating that smooth, airy dough.
- Sift Your Flours and Sugar: Removes lumps and aerates the ingredients for tender, light cookies.
- Don’t Overwork the Dough: Overmixing develops gluten and toughens the cookie, so mix gently.
- Keep Oven Temperature Consistent: Use an oven thermometer to avoid overheating, which can brown the cookies too much.
- Cool Completely Before Storing: Prevents condensation and keeps cookies crisp on the outside and soft inside.
How to Serve Melting Moments
Garnishes
Enhance the look and taste of your Melting Moments by dusting them with icing sugar or lightly drizzling with melted chocolate. Fresh berries or edible flowers also add a touch of elegance and freshness.
Side Dishes
Pair Melting Moments with a warm cup of tea or coffee to balance the buttery richness of the cookies. For a festive treat, serve alongside fresh fruit compote or creamy custard for dipping.
Creative Ways to Present
Arrange the Melting Moments in a decorative tin or stack them in layers separated by parchment paper for thoughtful gifting. Alternatively, sandwich pairs with flavored buttercream or jam for a charming afternoon tea offering.
Make Ahead and Storage
Storing Leftovers
Keep your Melting Moments in an airtight container at room temperature for up to a week. Store with a slice of bread inside the container to help maintain moisture and softness.
Freezing
Freeze baked cookies in a single layer on parchment paper, then transfer them to a freezer bag for up to three months. Thaw at room temperature before serving to retain their delicate texture.
Reheating
To refresh the butteriness and softness, briefly warm your Melting Moments in a low oven (140°C or 285°F) for 3 to 5 minutes before enjoying.
FAQs
What makes Melting Moments different from regular cookies?
Melting Moments use cornflour alongside plain flour, creating a uniquely fine, tender texture that literally melts in your mouth unlike typical cookies.
Can I use salted butter instead of unsalted butter?
While unsalted butter is preferred for better control over salt content, salted butter can be used by reducing added salt in the recipe.
How do I prevent Melting Moments from spreading too much during baking?
Ensure your butter is not too soft or melted before baking. Chilling the dough briefly can also help the cookies hold their shape better.
Are Melting Moments suitable for gluten-free diets?
Yes, by substituting the plain flour with a gluten-free flour blend, you can make a gluten-free version without compromising the cookie’s texture.
Can I add fillings or toppings to Melting Moments?
Absolutely! You can sandwich them with jam or buttercream or drizzle melted chocolate on top for extra flavor and decoration.
Final Thoughts
If you’ve been searching for that perfect cookie that feels like a little bite of heaven, Melting Moments are the answer. With their buttery softness and melt-away quality, these cookies bring joy to any occasion or quiet moment at home. Follow these steps, embrace the simple ingredients, and soon you’ll enjoy your very own batch of irresistible Melting Moments that everyone will adore.
Related Posts
- Homemade Copycat Olive Garden Lemon Cream Cake Recipe
- Easy Date and Walnut Traybake Cake Recipe
- 5 Irresistible Pineapple Pound Cake Recipes to Try

Melting Moments
- Total Time: 30-33 minutes
- Yield: About 20 cookies 1x
- Diet: Gluten Free (with flour substitution)
Description
Melting Moments are delicately soft, buttery cookies known for their melt-in-the-mouth texture and subtle sweetness. Made with simple pantry staples like butter, icing sugar, cornflour, and plain flour, this recipe offers an easy and quick method to bake irresistibly light and tender cookies perfect for any occasion, customizable to suit different flavors and dietary needs.
Ingredients
Main Ingredients
- 150g Unsalted butter, softened to room temperature
- 100g Icing sugar (powdered sugar), sifted
- 60g Cornflour (cornstarch), sifted
- 200g Plain flour (all-purpose flour), sifted
- 1 tsp Vanilla extract
- Pinch of salt
Instructions
- Prepare Your Ingredients and Equipment: Set the butter out to soften at room temperature. Preheat the oven to 160°C (320°F). Line a baking tray with parchment paper. Measure and sift the plain flour, cornflour, and icing sugar for best texture.
- Cream the Butter and Icing Sugar: Using a hand or stand mixer, beat the softened butter together with the icing sugar until the mixture is pale, smooth, and fluffy. This step helps create air pockets for a light, tender cookie.
- Mix in Vanilla and Dry Ingredients: Add the vanilla extract to the creamed mixture. Gently fold in the sifted plain flour and cornflour in batches, mixing carefully to avoid overworking the dough and keep it soft and crumbly.
- Shape the Cookies: Roll the dough into small balls approximately 3 cm in diameter. Arrange them spaced evenly on the baking tray. Gently flatten each ball with the back of a fork or your hand to form discs.
- Bake to Perfection: Bake the cookies in the preheated oven for 15 to 18 minutes until the edges are set but still pale. Avoid browning to maintain the signature melt-away texture.
- Cool and Optional Decorating: Remove from the oven and allow the cookies to cool completely on the tray. Once cooled, optionally dust with extra icing sugar or drizzle with melted chocolate for decoration.
Notes
- Use room temperature butter to ensure it creams well with the sugar, creating smooth and airy dough.
- Sift all dry ingredients to remove lumps and aerate for tender cookies.
- Do not overmix the dough to prevent tough cookies caused by gluten development.
- Maintain consistent oven temperature; using an oven thermometer helps prevent over-browning.
- Allow cookies to cool completely before storing to avoid condensation and preserve texture.
- Prep Time: 15 minutes
- Cook Time: 15-18 minutes
- Category: Desserts
- Method: Baking
- Cuisine: Australian
Nutrition
- Serving Size: 1 cookie (approx.)
- Calories: 90 kcal
- Sugar: 5g
- Sodium: 30mg
- Fat: 6g
- Saturated Fat: 4g
- Unsaturated Fat: 2g
- Trans Fat: 0g
- Carbohydrates: 9g
- Fiber: 0.2g
- Protein: 1g
- Cholesterol: 15mg
Keywords: Melting Moments, buttery cookies, melt in mouth, soft cookies, easy baking, homemade cookies, gluten free cookies

